20 Simple Halloween Nail Ideas for an Easy Spooky Manicure
Simple Halloween nail ideas are proof you don’t need a steady hand, a salon appointment, or a whole drawer of tools to look properly spooky. One tiny ghost, one little web, one pumpkin on a single accent nail — that’s often all it takes. These are the designs you can actually finish in one sitting, with regular polish, on a normal Tuesday night before the party.
If you want the full spooky-season lineup first, start with our Halloween nails ideas for the bigger, bolder sets, and save our Vampire nails ideas for the dark-glam side of October. Below, you’ll find 20 simple Halloween nail ideas, each one beginner-friendly, each one with the shade and the shortcut that makes it work.
What Are Simple Halloween Nail Ideas?
Simple Halloween nail ideas are easy, low-skill Halloween manicures built on one or two motifs per set — a ghost, a web, a pumpkin, a bat — instead of a full scene on every nail. Most of them use a plain base color with art on just one or two accent nails, so a wobbly line never ruins the whole manicure. They work on short nails, natural nails, and press-ons alike, and they’re the fastest route to a Halloween look that still reads as Halloween from across the room.
Tiny Ghost French Tips Simple Halloween Nail Ideas
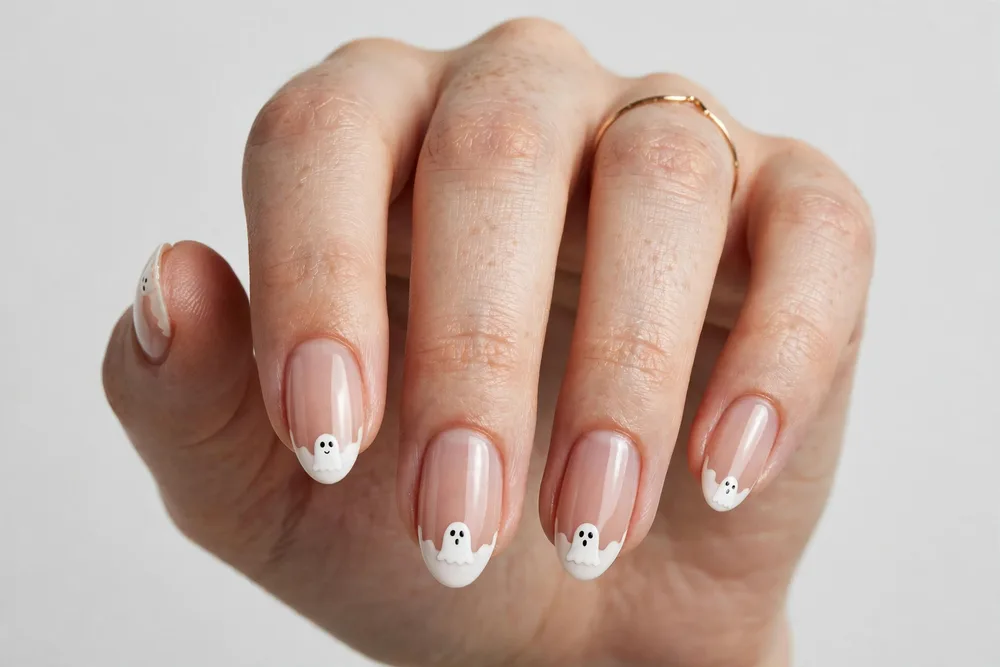
Paint a sheer nude base, then add a classic white French tip — and let a tiny ghost peek over the smile line on one or two nails. The ghost is just a rounded white blob with two black dot eyes, so it’s genuinely hard to mess up. Keep the rest of the nails plain and the whole set stays clean, cute, and very wearable.
Try Essie “Ballet Slippers” as the sheer base and OPI “Alpine Snow” for the tips and ghosts. A dotting tool does the eyes; a toothpick works too if you don’t own one. Seal with a glossy top coat and the ghosts look like they were painted by someone far more patient than you actually were.
Single Spiderweb Accent Simple Halloween Nail Ideas
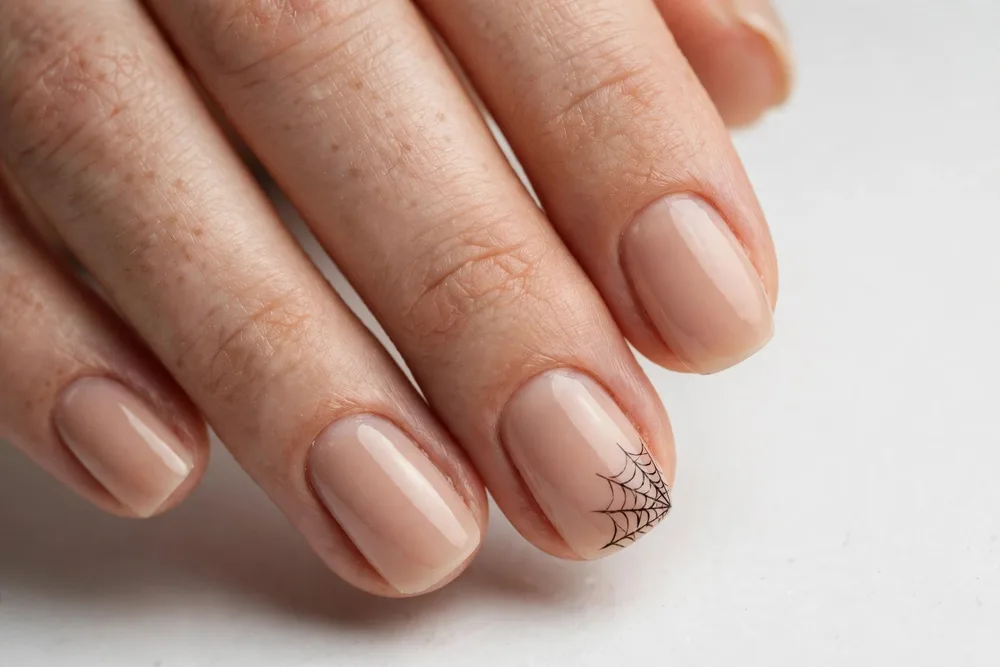
Here’s the lazy-girl trick that never fails: paint every nail a plain color, then draw one spiderweb on a single accent nail. A nude or soft grey base keeps it subtle, while the web — a few curved lines fanning out from one corner, joined by little arcs — does all the Halloween work. One nail of art, nine nails of peace.
Use a thin detail brush or a striper polish in black over OPI “Bubble Bath” for the softest version, or over matte black if you want drama. Don’t stress about perfect symmetry — real webs aren’t symmetrical either, and slightly wonky lines actually look more like a web. Add one tiny spider dot if you’re feeling brave.
Pumpkin Dot Art Simple Halloween Nail Ideas
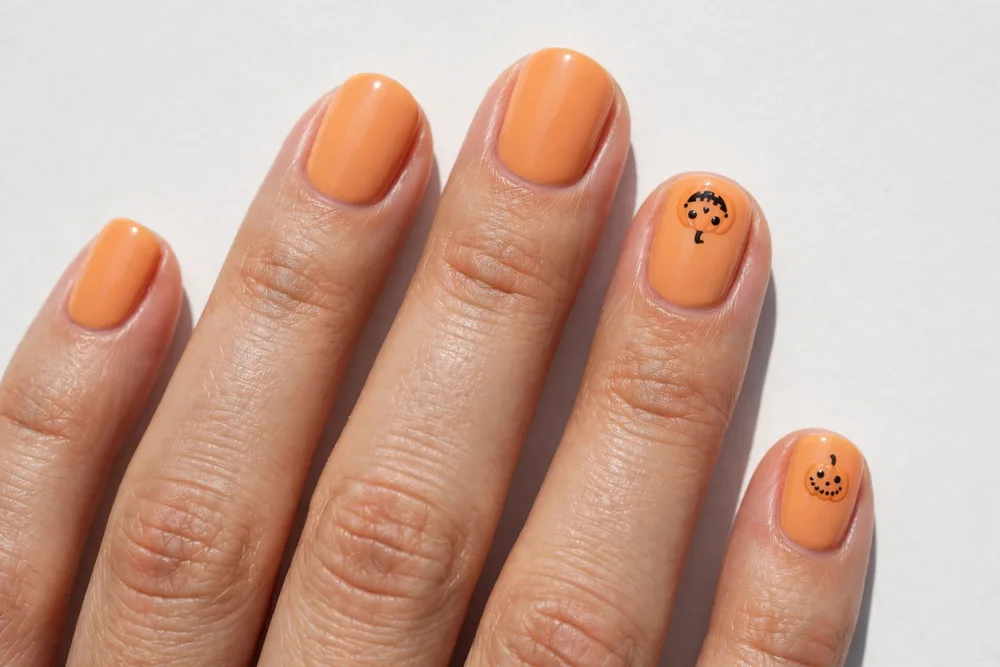
Dot art is the beginner’s best friend, and pumpkins are basically made for it. Paint your nails a warm cream or soft orange, then use a dotting tool to stamp a little pumpkin — a cluster of orange dots with a black triangle face — on the ring fingers. No brush skills required, and the result looks deliberate rather than doodled.
OPI “Cajun Shrimp” makes a juicy pumpkin orange, and Essie “Licorice” draws the face in one steady dot at a time. If freehand faces scare you, skip the face entirely: a plain orange dot pumpkin with a tiny green stem reads as pumpkin just fine. Top coat smooths the dots into a clean, raised-free finish.
Candy Corn Tips Simple Halloween Nail Ideas
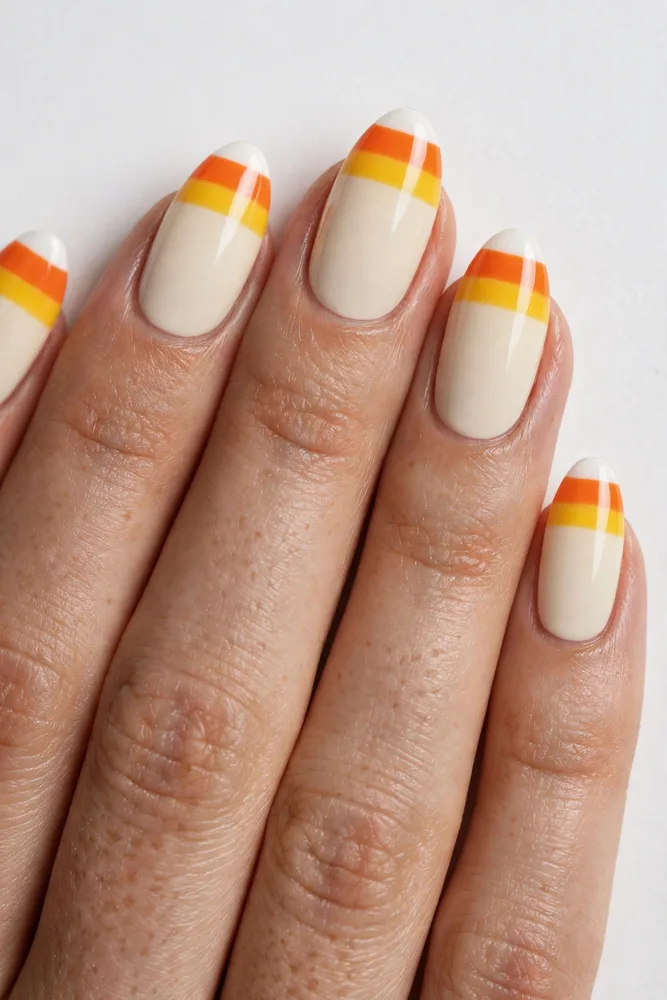
Candy corn tips turn a French manicure into Halloween without any drawing at all. Paint the tip white, then add a stripe of orange, then a stripe of yellow below it — three bands, done. It’s sweet, it’s instantly recognizable, and it works on any nail length because the color does the talking.
The trick is keeping the bands thin and even, so use nail tape or a French-tip guide if your hand shakes. OPI “Alpine Snow”, “Cajun Shrimp”, and a soft yellow like Essie “Sunny Daze” (or any pale yellow you own) stack neatly. A glossy top coat melts the stripes together so they look painted, not taped.
Black Cat Silhouette Accent Simple Halloween Nail Ideas
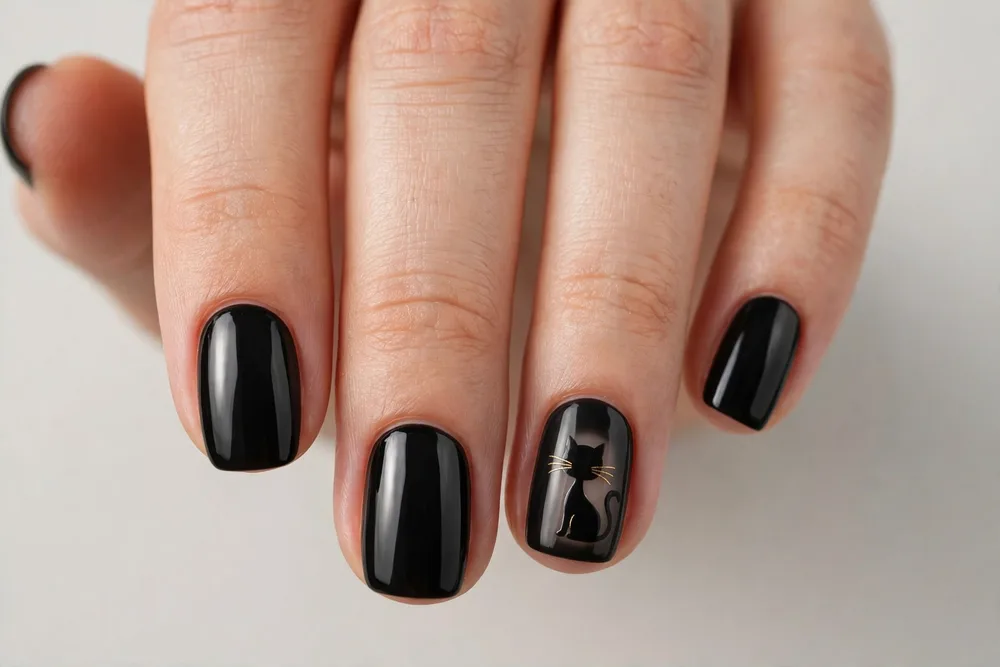
A black cat silhouette on one accent nail is the whole costume in miniature. Keep the other nails glossy black or deep plum, then paint a simple cat shape — two triangle ears and a curved body — on the ring finger. Add gold whiskers with a detail brush and suddenly your plain black manicure has a personality.
OPI “Black Onyx” is the obvious base, and a gold striper polish draws whiskers in seconds. If drawing a whole cat feels like too much, paint just the ears and eyes peeking over the cuticle line — the peekaboo version is even easier and honestly cuter. Short nails suit this one perfectly.
Blood Drip Accent Simple Halloween Nail Ideas
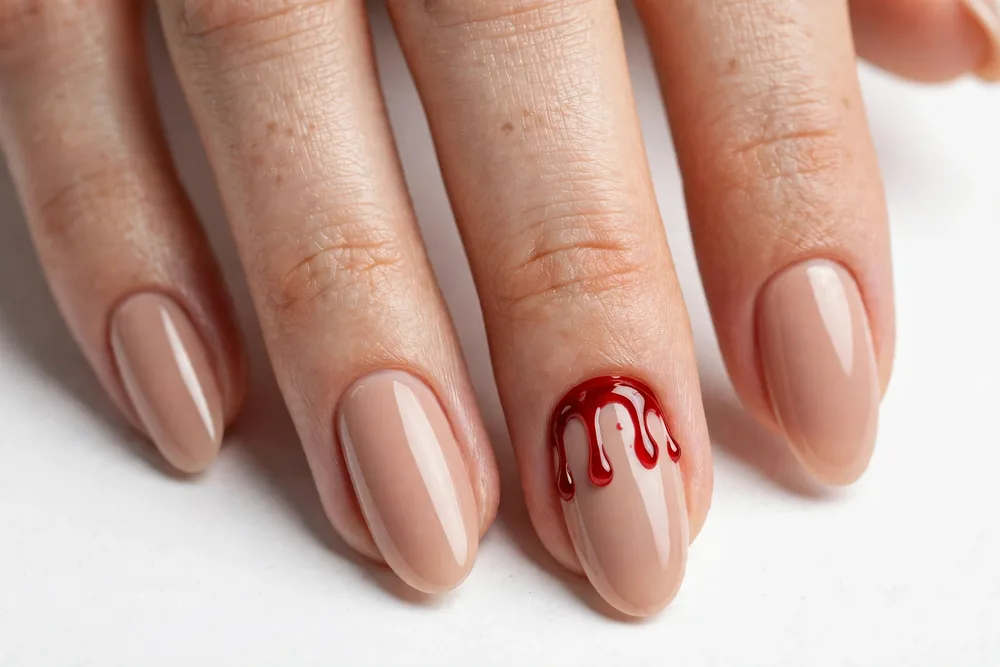
Blood drip nails sound dramatic, but the simple version is just one accent nail with red drips falling from the cuticle over a nude base. The drips don’t need to be even — uneven lengths look more realistic, which is rare good news for beginners. One accent nail keeps it chic; ten nails of drips is a costume choice.
Use a deep red like OPI “I’m Not Really A Waitress” over Essie “Ballet Slippers”, and let the polish pool slightly at the cuticle before dragging it down in thin lines with a detail brush. Gel gives the drips a raised, dimensional look, but regular polish works fine for one night. Keep the other nails plain nude for contrast.
Bat Silhouette on Nude Simple Halloween Nail Ideas
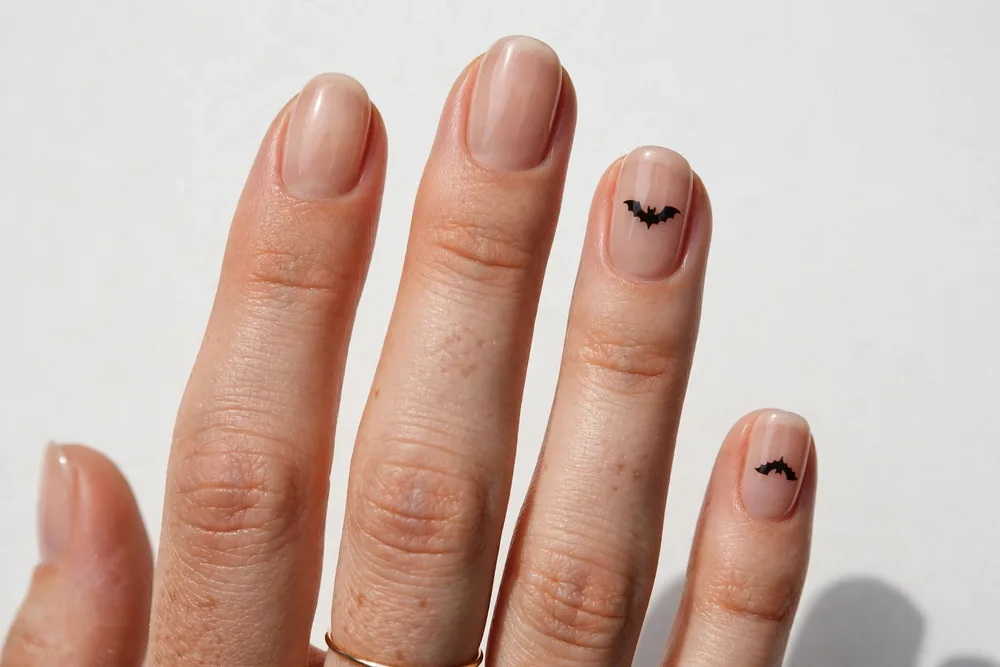
Tiny black bats scattered over a sheer nude base are spooky without trying hard. The bat shape is forgiving — two curved wings and a small body — and you only need one or two per hand. On a milky nude base they look like they fluttered in from somewhere elegant, not a costume shop.
Start with OPI “Bubble Bath” or a milky sheer, then stamp or paint bats with OPI “Black Onyx” and a detail brush. Nail stickers are the honest shortcut here and nobody at the party will know. Place the bats near the tip or the cuticle, never dead center, and the set looks intentional rather than random.
Mummy Wrap Accent Simple Halloween Nail Ideas
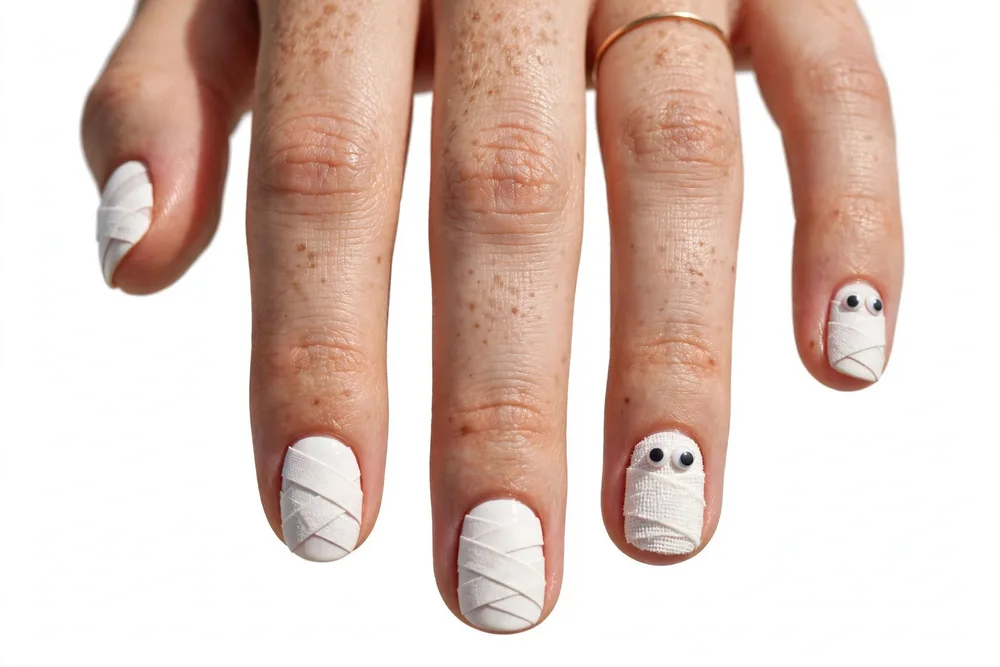
Mummy nails are white lines wrapped unevenly across a nude base, with tiny eyes peeking through on the accent nails. The lines are supposed to be messy — that’s the whole point of bandages — so this is the rare design where a shaky hand is an advantage. Add two little googly eyes and you’re done.
Paint Essie “Ballet Slippers” first, then draw uneven white stripes with OPI “Alpine Snow” and a detail brush, crossing them at random angles. The eyes are two black dots on a white oval, or a pair of tiny googly-eye stickers if you want the joke to land harder. Matte top coat makes the bandages look like cloth.
Orange French Tips Simple Halloween Nail Ideas
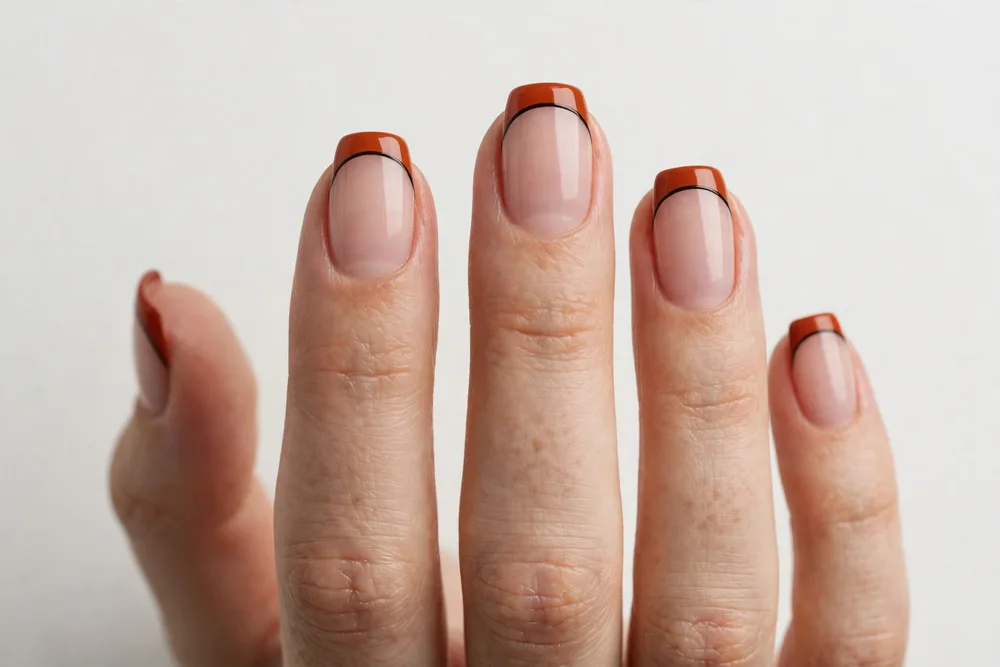
Swap the white tip of a French manicure for burnt orange and outline it in a thin black line, and you’ve got Halloween nails you could wear to work. It’s neat, it’s seasonal, and it takes no more skill than a regular French. The black outline is what tips it from “nice fall nails” into “oh, Halloween” territory.
Try OPI “Cajun Shrimp” for the tip over a sheer pink base, then trace the smile line with a black striper. French-tip guides make the orange band even on all ten nails, which is the part people actually notice. Finish glossy — matte orange tips can look muddy, while glossy ones look like candy.
Ghost Doodles on Sheer Pink Simple Halloween Nail Ideas
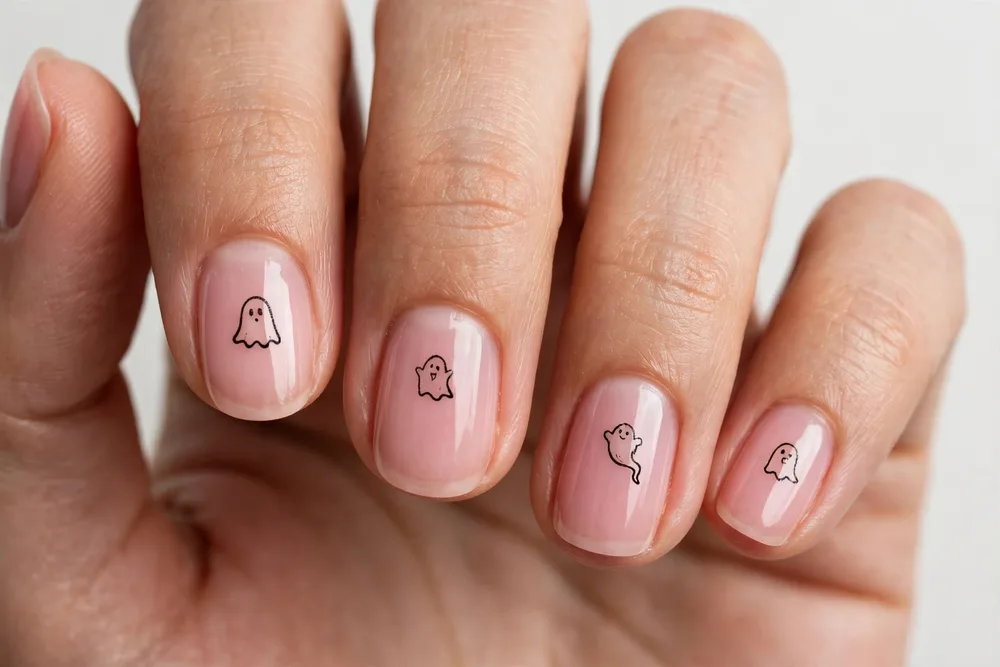
Ghost doodles are the notebook-margin version of Halloween nails: thin, wobbly white ghosts sketched over a sheer pink base, none of them matching. The charm is in the imperfection — these aren’t supposed to look salon-perfect. They’re supposed to look like you doodled them while watching a scary movie, because you did.
Use a milky pink like Essie “Ballet Slippers” and draw the ghosts with a fine detail brush in white, adding black dot eyes last. Keep the ghosts small and off-center, and leave some nails bare — negative space is what makes this look modern instead of busy. One coat of glossy top coat seals the sketch.
Spiderweb Corner Simple Halloween Nail Ideas
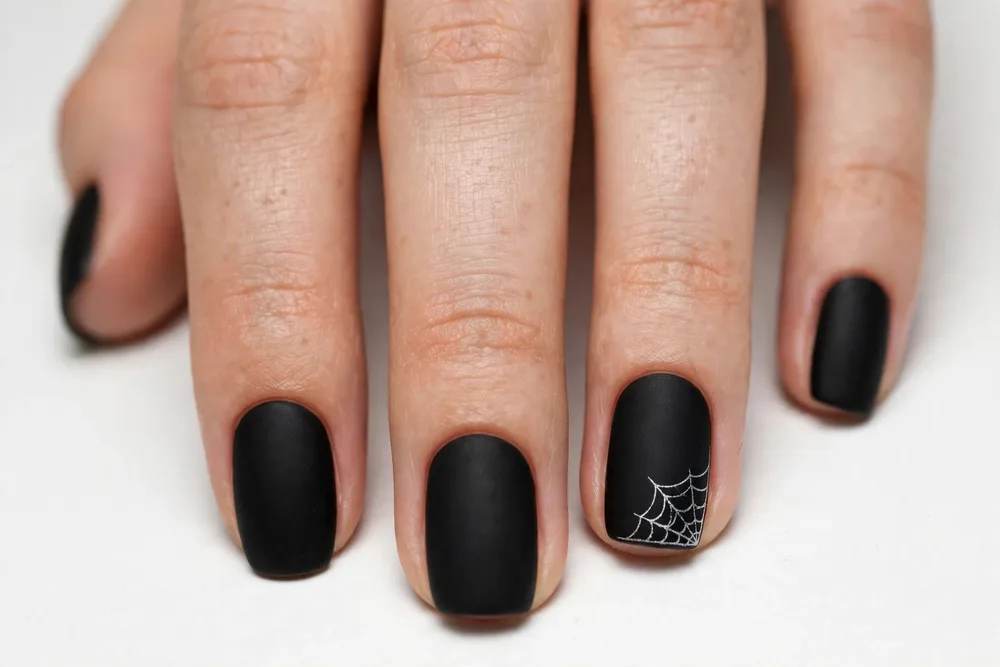
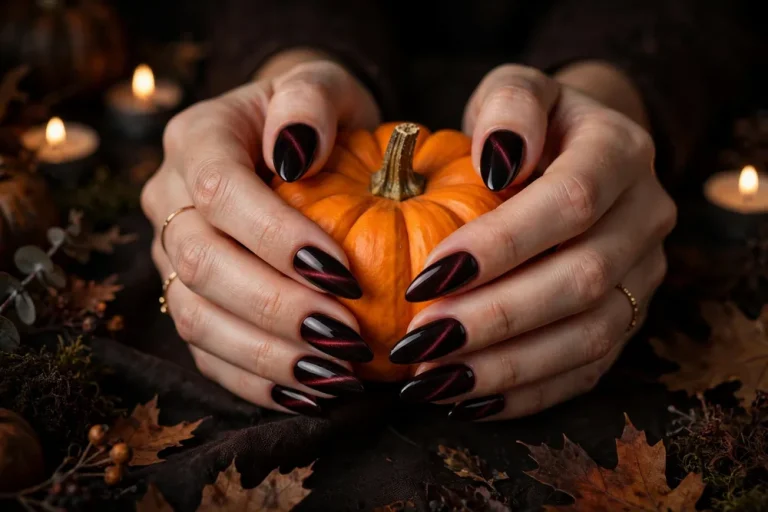
A spiderweb tucked into one corner of the nail is the minimalist’s Halloween. Paint your nails matte black, then draw a small web in silver or white in the corner of each ring finger only. The rest of the set stays plain matte black, which you’d wear in January anyway — the web just gives it a season.
Matte top coat over OPI “Black Onyx” is the base, and a silver striper polish draws the web lines cleanly. Three or four lines fanning from the corner, joined by two arcs, is plenty — more lines make it look crowded. Skip the spider entirely; the web alone is the quiet flex.
Jack-o-Lantern Accent Simple Halloween Nail Ideas
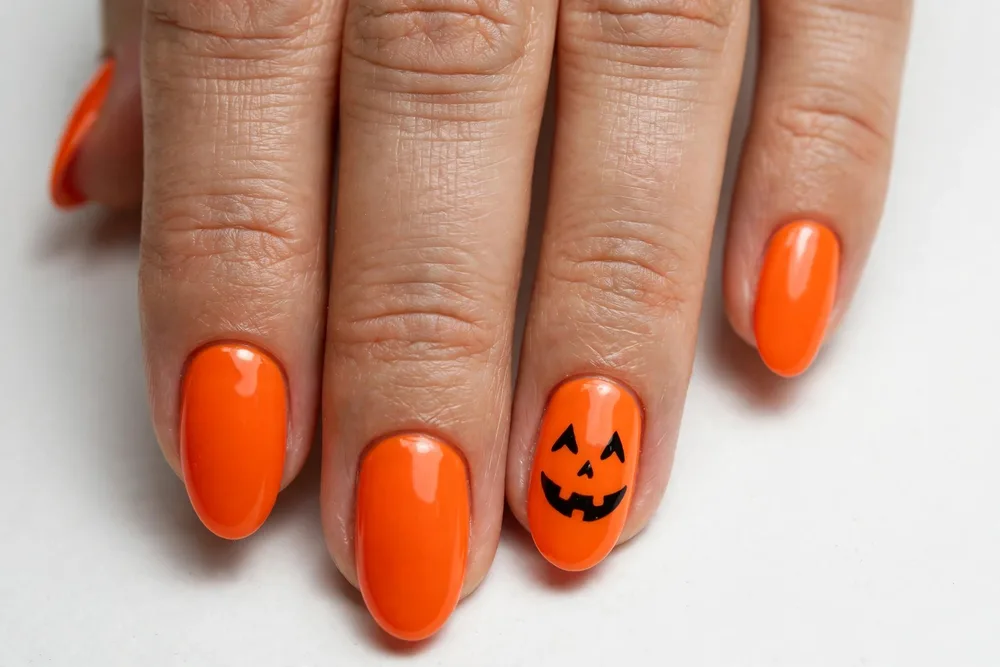
One jack-o-lantern accent nail carries a whole orange manicure. Paint the rest bright orange, then turn the ring finger into a pumpkin face: two triangle eyes and a zigzag smile in black. It’s the most literal Halloween design there is, and that’s exactly why it works — everyone gets it instantly.
OPI “Cajun Shrimp” or any juicy orange is the base, with OPI “Black Onyx” for the face, applied with a dotting tool for the triangles. Keep the face small and centered so the nail doesn’t look crowded, and use a glossy top coat to make the orange pop. Short, rounded nails suit this one best.
Purple Ombre with Stars Simple Halloween Nail Ideas
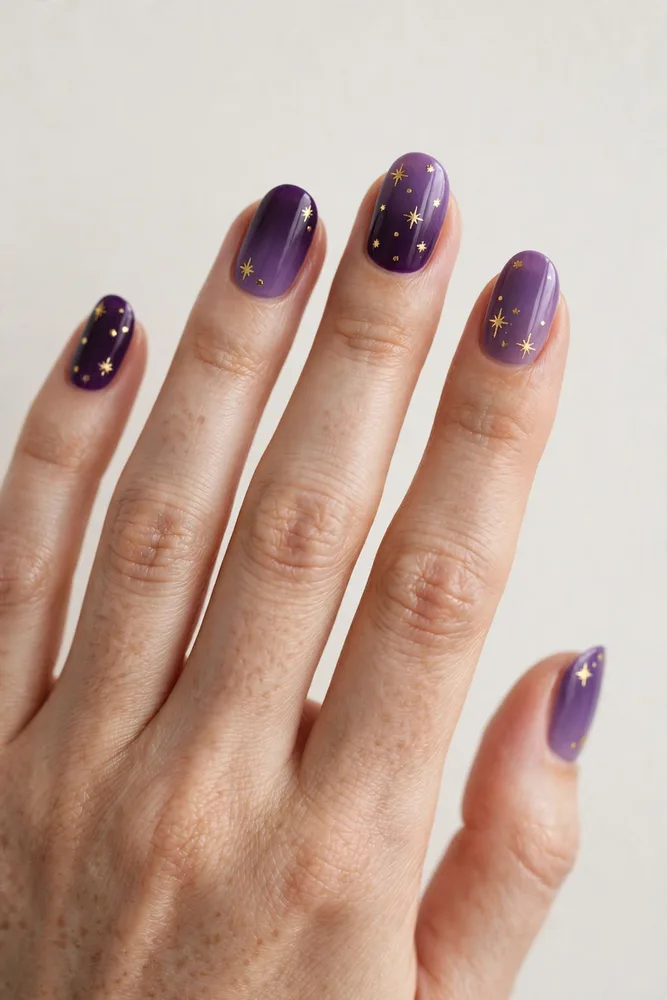
Deep purple ombre with tiny gold stars is Halloween for people who don’t like Halloween nails. Sponge a gradient from dark plum at the cuticle to black at the tip, then dot a few gold stars on top. It reads as night sky, witchy, and a little bit magic — without a single ghost in sight.
Use a makeup sponge to blend OPI “Lincoln Park After Dark” into a plum like Essie “Bahama Mama”, then add stars with a gold dotting tool or star stickers. Two coats of glossy top coat smooth the sponge texture into a real gradient. This one also survives well past October 31, which is a bonus.
Glow Ghost on Black Simple Halloween Nail Ideas
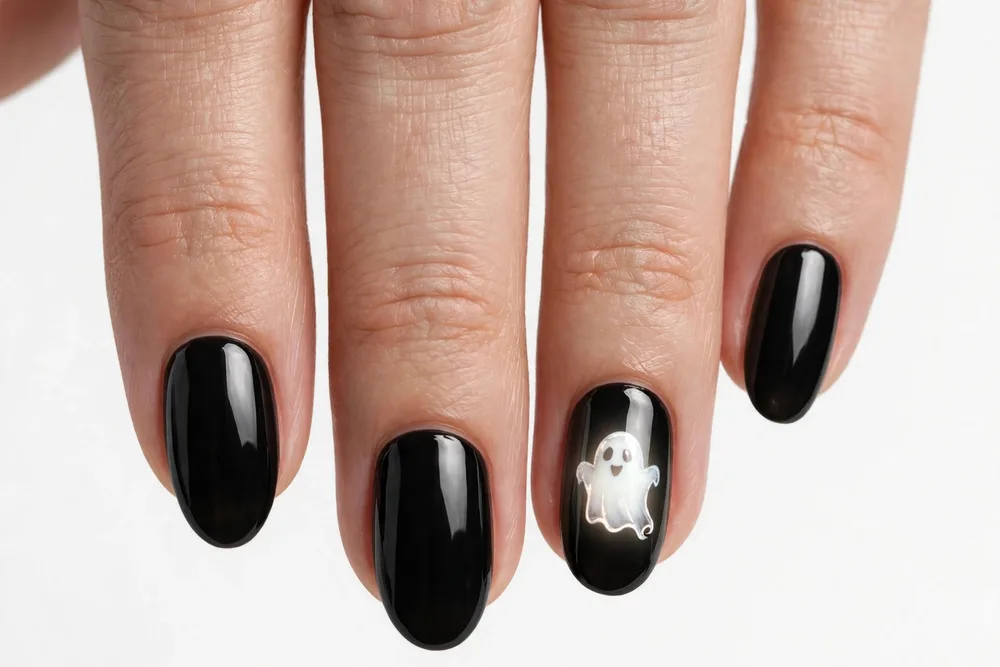
A single glowing white ghost on glossy black nails is the easiest high-impact design on this list. The contrast does everything: one white shape on a black background, visible from across the room. Paint nine nails plain black, put the ghost on one ring finger, and call it a day.
OPI “Black Onyx” with an OPI “Alpine Snow” ghost is all you need, plus a dotting tool for the eyes. For an actual glow, use glow-in-the-dark polish for the ghost shape and seal it well — it charges in daylight and pays off at the party. Keep the ghost chunky and simple; fine details get lost on black.
Candy Corn Gradient Accent Simple Halloween Nail Ideas
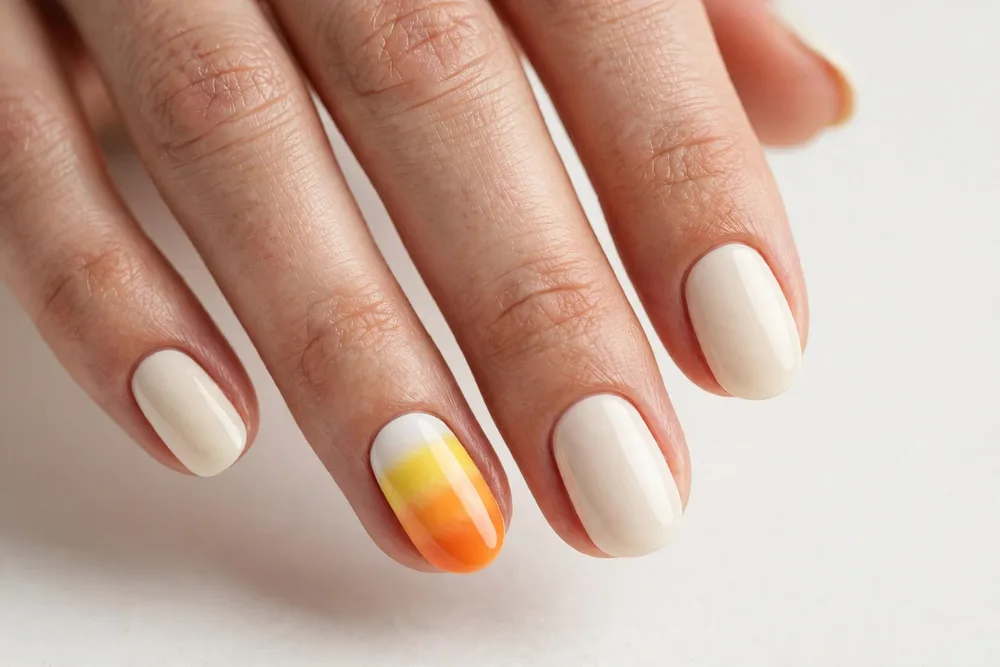
The candy corn gradient is the softer cousin of candy corn tips: sponge white, orange, and yellow into a smooth fade on one or two accent nails, and keep the rest cream. It looks like you spent ages blending, but a sponge does the blending for you in about thirty seconds per nail.
Paint the accent nail white first, then sponge on stripes of orange and yellow, dabbing until the edges blur. OPI “Alpine Snow”, “Cajun Shrimp”, and a pale yellow work well, and a thick glossy top coat is non-negotiable — it turns sponge texture into a smooth gradient. Cream nails on the other fingers keep it sweet, not loud.
Witch Hat Accent Simple Halloween Nail Ideas
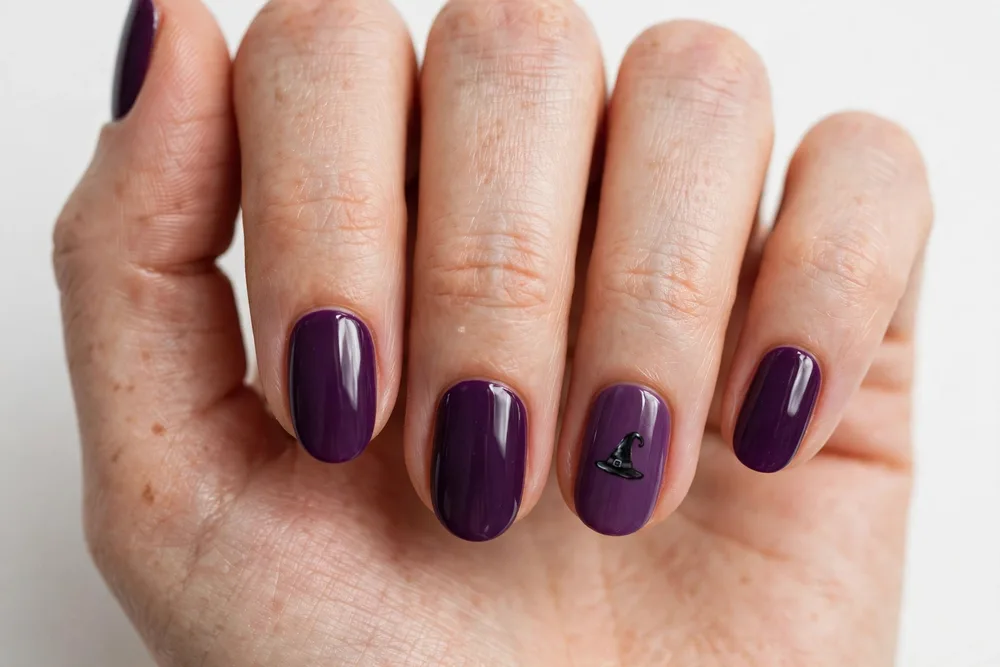
A tiny witch hat on one accent nail over deep purple nails is a whole costume reference in one shape. The hat is just a triangle with a brim line — genuinely one of the easiest Halloween shapes to paint — and a little gold buckle dot finishes it. The other nails stay plain purple, so the hat gets all the attention.
Use Essie “Bahama Mama” or a deep plum as the base, OPI “Black Onyx” for the hat, and a gold striper for the buckle. Place the hat near the tip so it doesn’t crowd the cuticle, and keep it small — a hat that covers the whole nail looks like a blob. One accent nail per hand is plenty.
Tiny Skeleton Accent Simple Halloween Nail Ideas
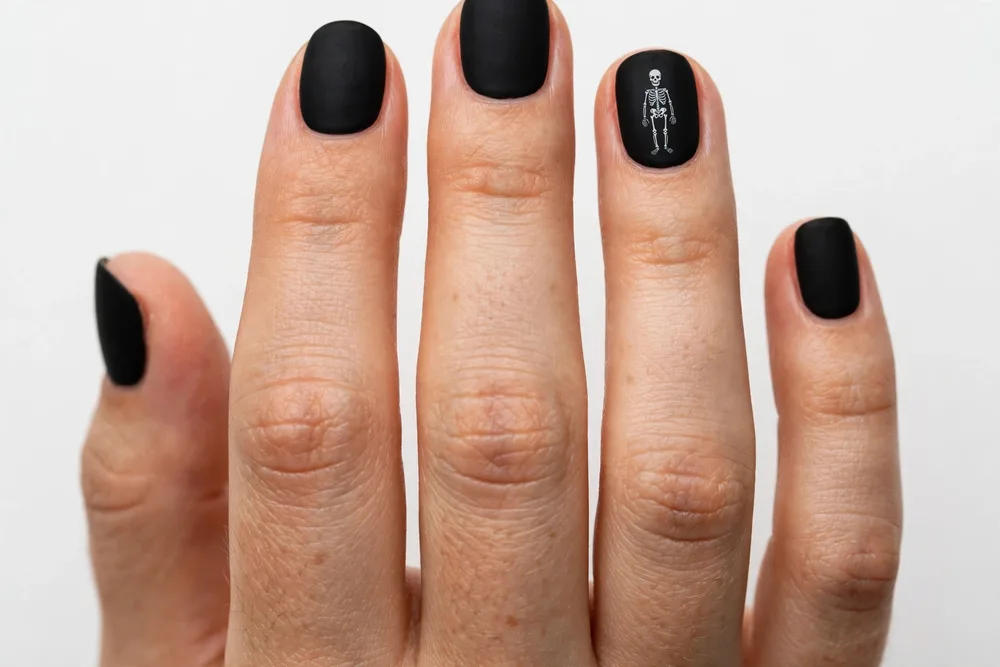
A tiny white skeleton outline on matte black nails is spooky and surprisingly chic. You don’t need a full skeleton — a small skull and a few rib lines on one accent nail reads as skeleton instantly. The matte black base keeps it graphic and modern, like a little line drawing on a chalkboard.
Paint OPI “Black Onyx” and seal with a matte top coat, then draw the skull with OPI “Alpine Snow” and a fine detail brush: a circle, two eye dots, and three short rib lines below. If the ribs go wrong, wipe just that nail and retry — matte base coats are forgiving. Skeleton stickers are a totally fair shortcut too.
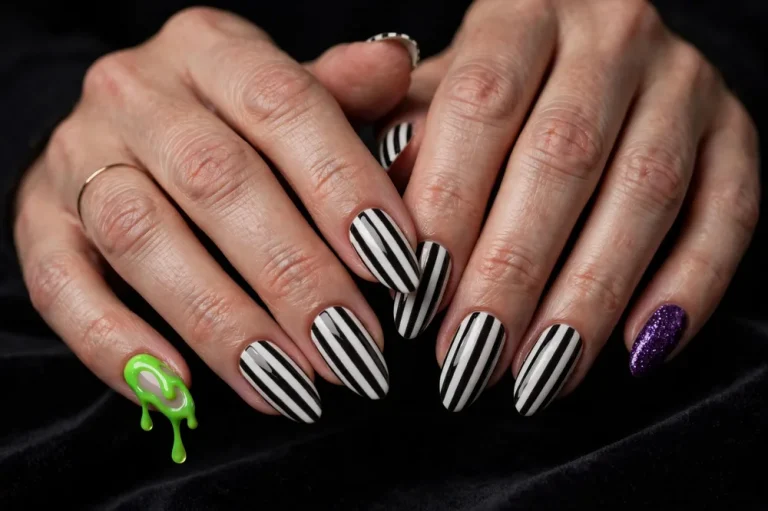
Slime Green Tips Simple Halloween Nail Ideas
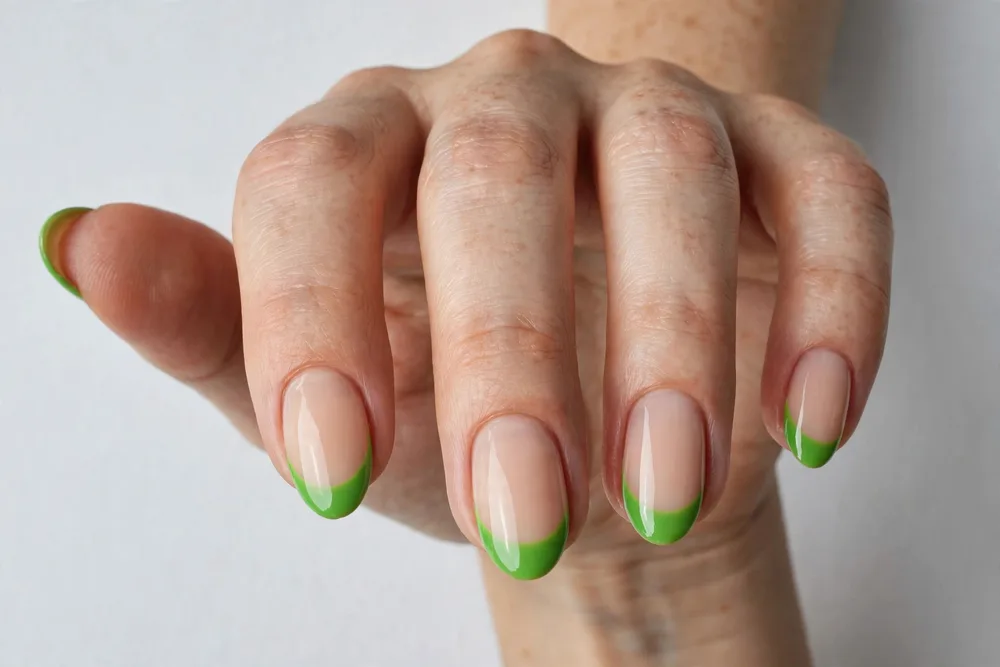
Slime green French tips over a nude base are weird in the best way. The neon-meets-nude combo is very Halloween — think potion, swamp, witch’s brew — but the French shape keeps it tidy. It’s the design for someone who wants Halloween nails without a single recognizable Halloween character on them.
OPI’s greens run more forest than slime, so look for a neon or lime green polish (or a green like Essie “Mojito Madness” layered over white for extra pop) over Essie “Ballet Slippers”. Use French guides for an even tip line, and finish glossy — neon shades go chalky fast under matte top coat. Two thin coats beat one thick one here.
Haunted Moon Accent Simple Halloween Nail Ideas
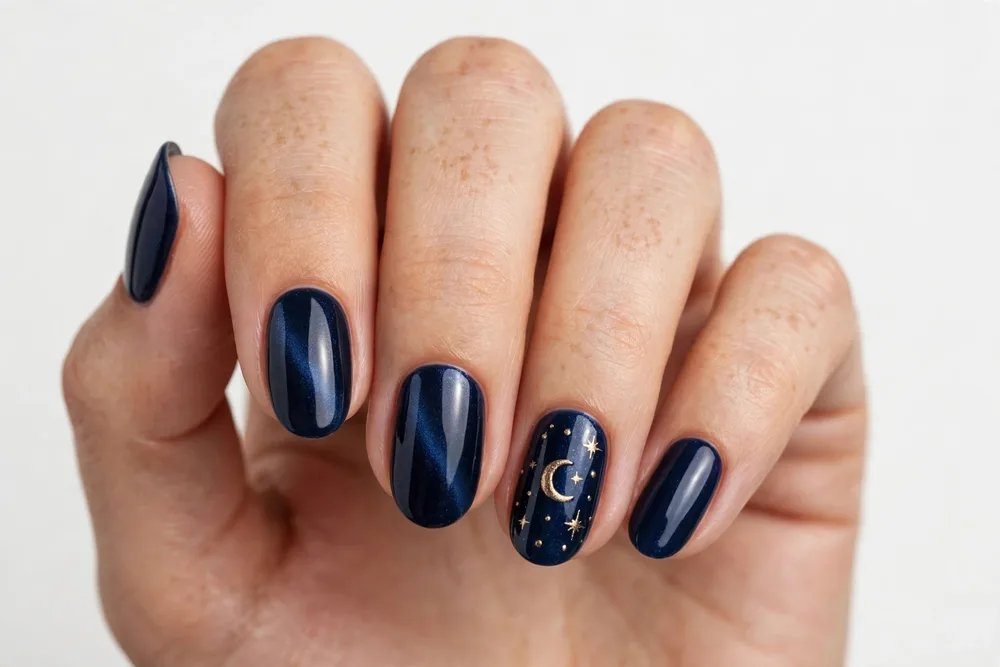
A crescent moon and a few stars on midnight blue nails is Halloween at its dreamiest. The moon is one curved shape — paint a crescent in gold or silver on the accent nails, scatter tiny star dots around it, and the whole set feels like a haunted night sky. No characters, no gore, just mood.
Use OPI “Russian Navy” or a deep midnight blue as the base, and a gold striper for the crescent. Stars are just dots in two sizes, so a dotting tool does the whole sky. Keep the moon on the ring fingers only and the other nails plain blue, and the set stays elegant enough for the office the next morning.
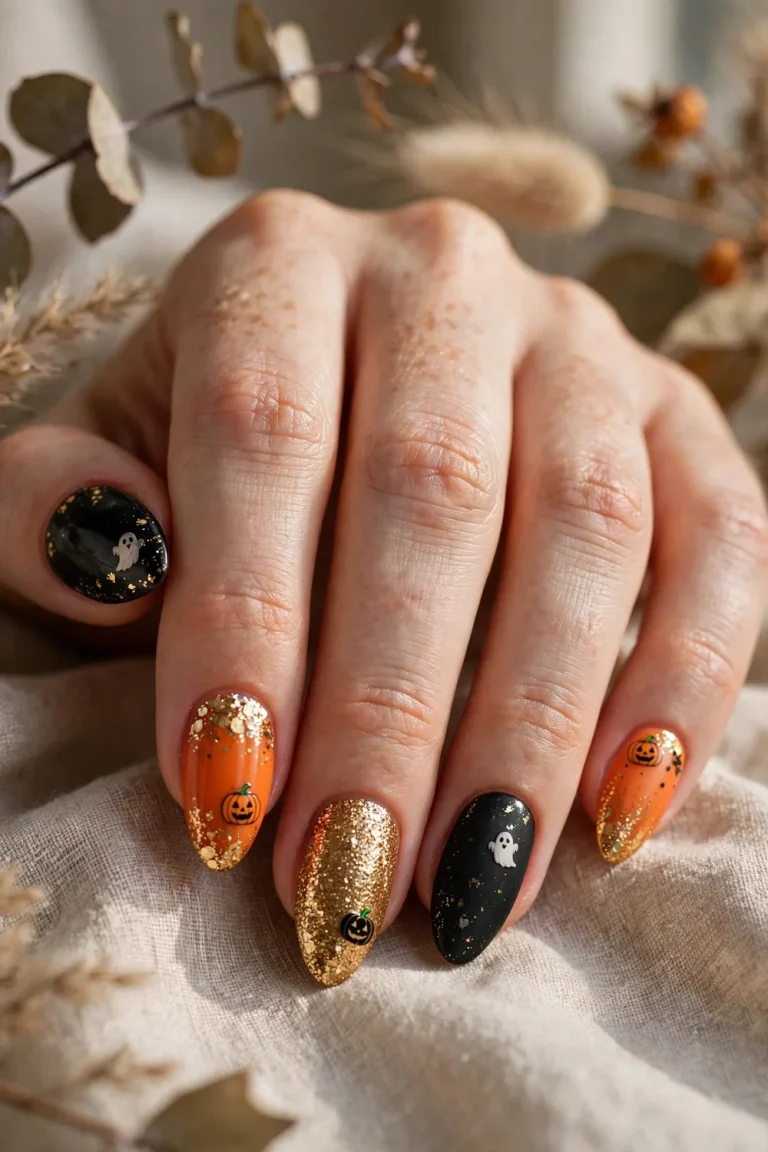
Matte Black with One Ghost Simple Halloween Nail Ideas
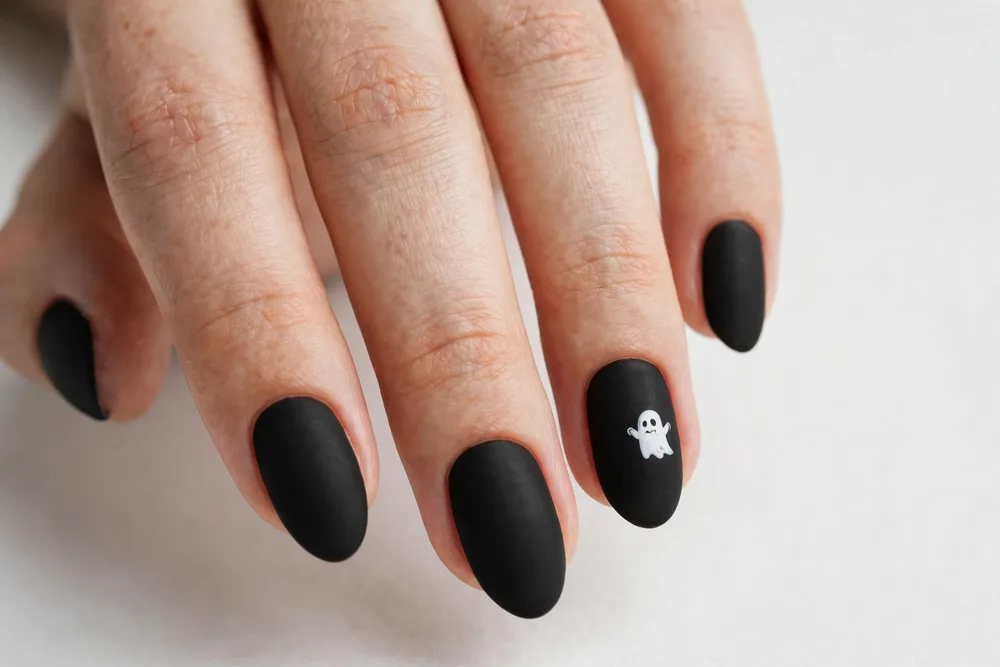
Matte black nails with a single tiny white ghost are the ultimate low-effort Halloween flex. The matte finish makes the black look expensive, and one small ghost on one nail is the only joke — everyone notices it precisely because it’s the only thing there. It’s minimalism with a punchline.
Paint OPI “Black Onyx”, seal with a matte top coat, then paint the ghost in glossy white so it pops against the matte base — the finish contrast is the secret. A glossy ghost on matte black catches light differently and looks intentional. If you only have time for one Halloween nail this year, make it this one.
How to Ask Your Nail Tech for Simple Halloween Nail Ideas
Show your nail tech a photo, name the base shade, and say the words “one accent nail” — that phrase alone tells them you want simple, not a full set of art. Ask for the art on the ring fingers only, and mention whether you want gel or regular polish, because gel gives drips and webs a raised, longer-lasting finish. If you’re booking a full set of hand-painted scenes, say so when you book, since detailed art needs extra time — but for the designs in this list, a standard appointment is plenty. And if you’re doing them at home, invest in one dotting tool and one thin detail brush; those two tools cover nearly every design here.
Frequently Asked Questions
What are the easiest Halloween nails for beginners?
One accent nail designs are the easiest: a single ghost, web, or pumpkin on the ring finger while the other nails stay a plain color. Dot art, candy corn tips, and French-tip swaps need no freehand drawing skill at all, and stickers or stamping plates cover the rest. Start with one motif, not a scene, and your first attempt will look salon-done.
Can I do simple Halloween nails on short nails?
Yes — most simple designs actually look better on short nails. Ghost tips, cat silhouettes, webs in the corner, and single accent art all fit short, rounded shapes perfectly, while full scenes and long drips need length. Keep the art small and off-center, and short nails will carry Halloween just as well as long ones.
What colors do I need for simple Halloween nails?
Black, white, orange, and a nude or sheer pink cover almost every design in this list. Add a deep purple or midnight blue if you want the witchy and night-sky looks, and a gold striper for stars, whiskers, and moon details. You don’t need a special Halloween collection — four or five everyday shades are enough.
How long do simple Halloween nails last?
Regular polish usually lasts a few days to a week, while gel lasts two to three weeks. Simple designs hold up better than detailed ones because there’s less art to chip — a plain base with one accent nail shows wear far less than a full set of scenes. Reapply a thin top coat every two or three days to stretch any Halloween set.
Do I need special tools for Halloween nail art?
A dotting tool and a thin detail brush cover nearly everything here, and a toothpick substitutes for the dotting tool in a pinch. French-tip guides help with candy corn and colored tips, and a makeup sponge makes the ombre and gradient designs. Stickers and stamping plates are fair shortcuts, not cheating — the result is what matters.
Can I wear simple Halloween nails after October 31?
Many of them, yes. Purple ombre with stars, haunted moons, matte black with one ghost, and orange French tips all pass as fall nails well into November — just skip the pumpkin faces and candy corn after the holiday. The plain-color versions of these designs are the ones worth keeping in your rotation.