20 Halloween Nails for Kids Ideas That Are Cute, Easy, and Totally Spook-Free
Halloween nails for kids should be fun first and fussy never — no scary gore, no tiny details that take an hour, and nothing that falls apart before trick-or-treating even starts. The best kid-friendly designs are the ones a child can actually sit still for: a smiling ghost, a chubby pumpkin, a candy corn stripe, all painted on short, natural nails with polish that peels or wipes off easily afterwards.
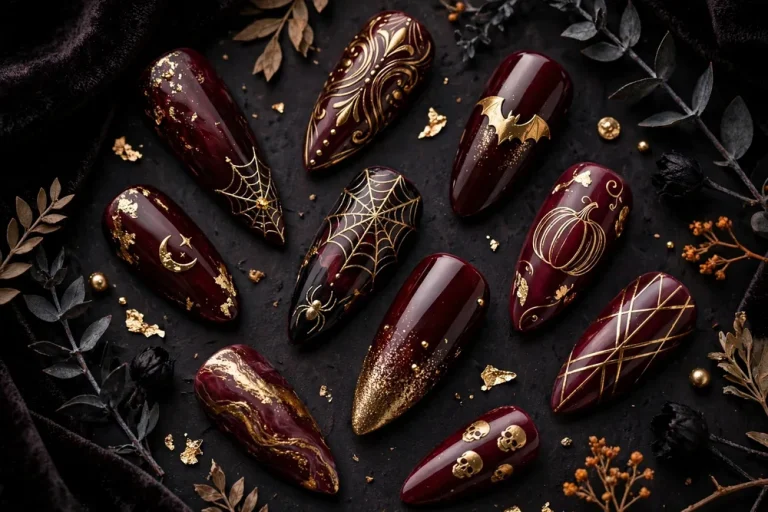
If you want the grown-up version of this holiday first, start with our Halloween nails roundup for spookier, salon-level ideas — then come back here for the kid-safe versions. Below, you’ll find 20 Halloween nails for kids ideas, from friendly ghosts to glow-in-the-dark dots, each one with the shades and the simple trick that makes it work on little hands.
What Are Halloween Nails for Kids?
Halloween nails for kids are simple, cute, non-scary Halloween manicures designed for children’s short, natural nails — think friendly ghosts, smiling pumpkins, black cats, candy corn, and spiderwebs in bright or pastel colors, rather than blood, gore, or horror-movie imagery. They are usually painted with water-based, peel-off polish or regular kid-safe polish, applied in a few easy steps with dots, stickers, or a dotting tool, and removed gently with non-acetone remover or by peeling. The whole point is a festive look a child enjoys wearing to a party, a school event, or trick-or-treating — and that a parent can take off without a battle.
Friendly Ghost Halloween Nails for Kids
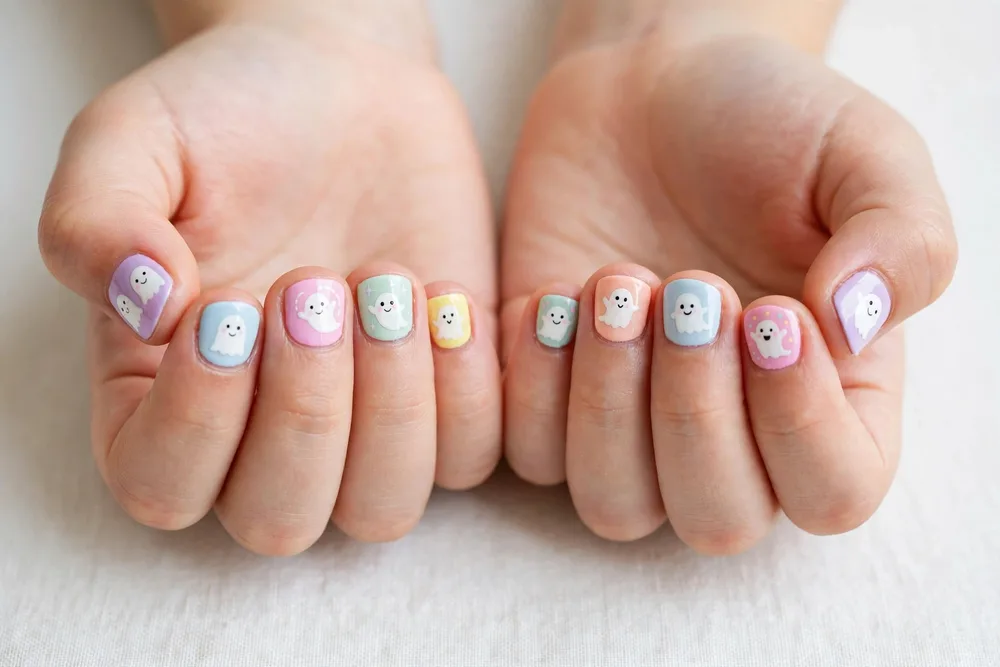
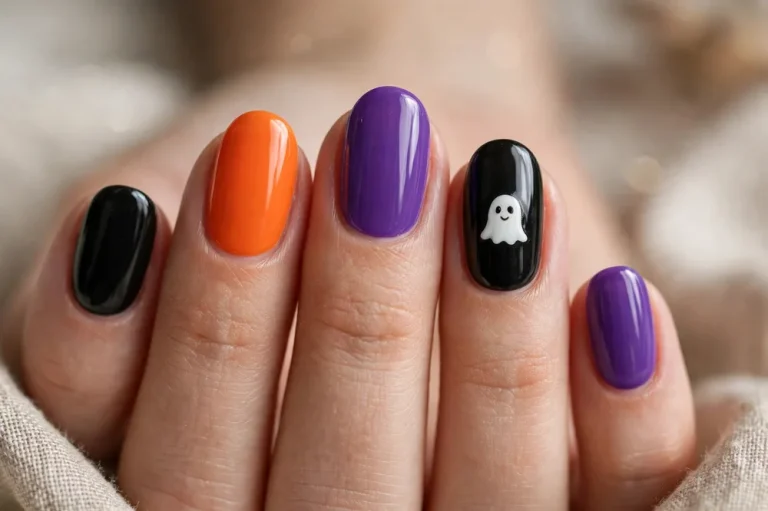
This is the one to start with if it’s your child’s first Halloween manicure, because it’s almost impossible to mess up. A soft pastel base — mint, lavender, or baby pink, like Essie Ballet Slippers layered over a pastel — gets a simple white ghost shape on one or two nails, with two tiny black dots for eyes. That’s it. No mouth needed, no shading, and the wobblier the ghost, the cuter it looks.
Use the rounded end of a bobby pin for the ghost’s head and a toothpick for the eyes, and keep the nails short and rounded. A peel-off base coat underneath means the whole set comes off in one satisfying peel after the party, which most kids find just as fun as putting it on.
Kawaii Pumpkin Patch Halloween Nails for Kids
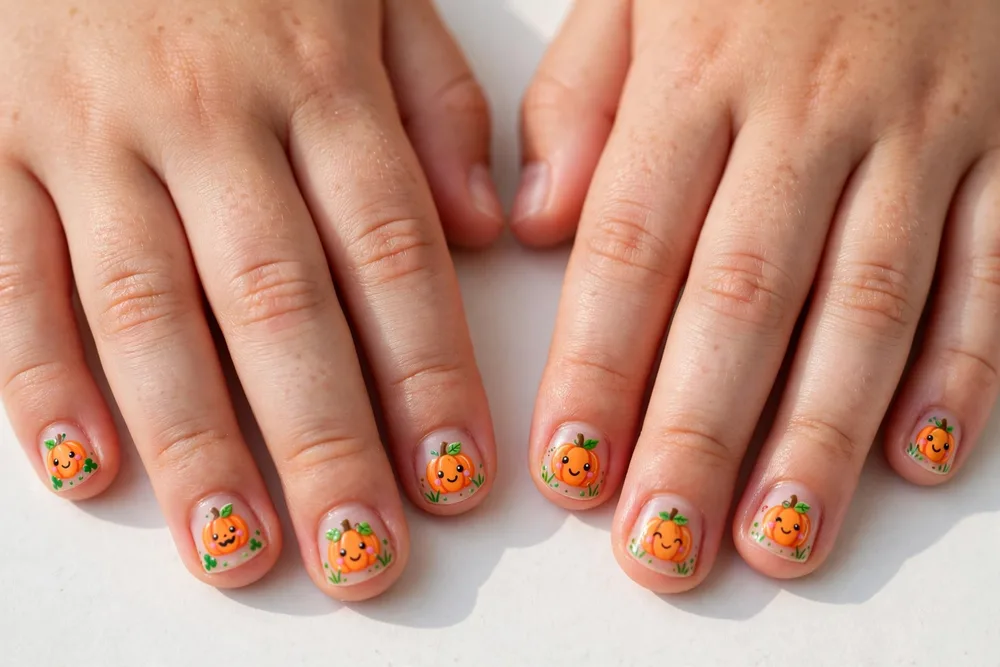
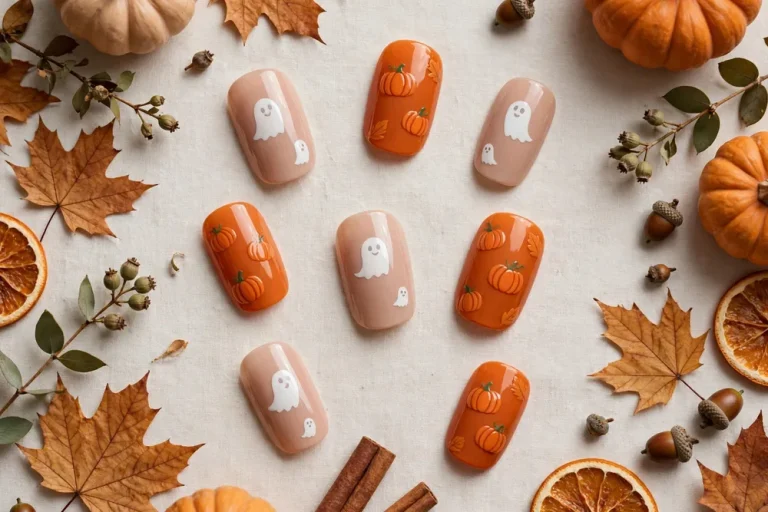
Tiny smiling pumpkins are pure kawaii — round, orange, and cheerful, with a little green stem and a face that looks happy rather than haunted. Paint them on a nude or pale yellow base so the orange pops, and give each pumpkin a different expression: one winking, one grinning, one with rosy cheeks made from a single pink dot.
OPI Cajun Shrimp is a great pumpkin orange, and a dotting tool does most of the work — one big orange dot, squashed slightly, becomes the pumpkin body. Add the stem with a thin brush or a green nail sticker, and seal with a quick-dry top coat so small hands don’t smudge the faces while they dry.
Retro Cartoon Monster Mash Halloween Nails for Kids
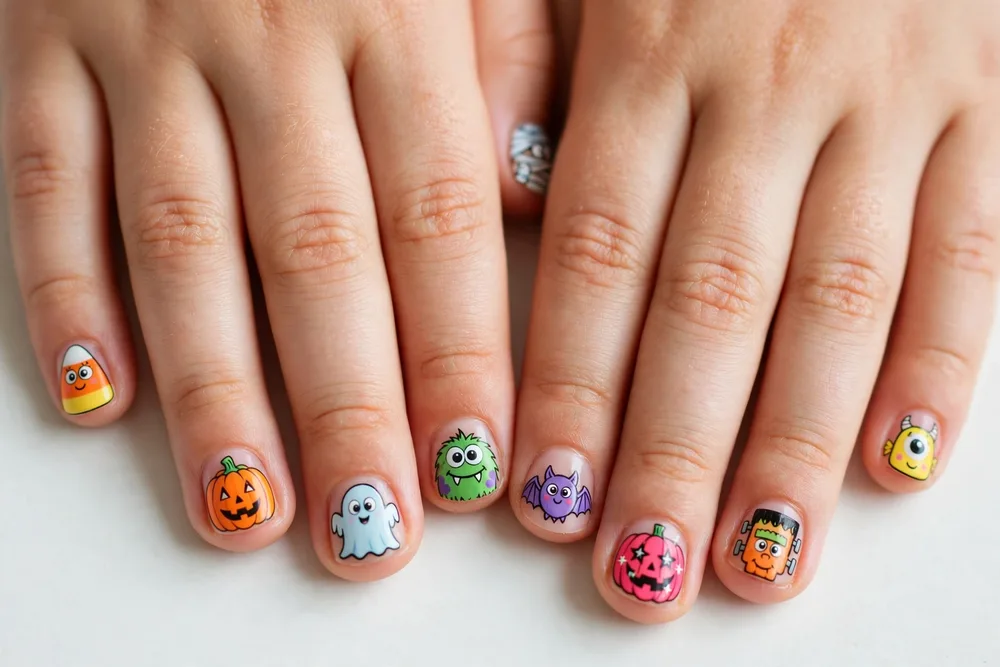
Think Saturday-morning cartoons, not scary movies: goofy one-eyed monsters in bright blue, green, and purple, each with a different silly expression. This design works because the monsters don’t have to match — in fact, the more mismatched they are, the better the set looks, which takes all the pressure off getting every nail perfect.
Start with a bold base color on each nail, then add one big white eye dot and a smaller black pupil with a dotting tool. A little black zigzag mouth finishes it. If freehand feels tricky, monster stickers or decals give the same cartoon look in seconds, and kids love picking which monster goes on which finger.
Sparkly Spiderweb Halloween Nails for Kids
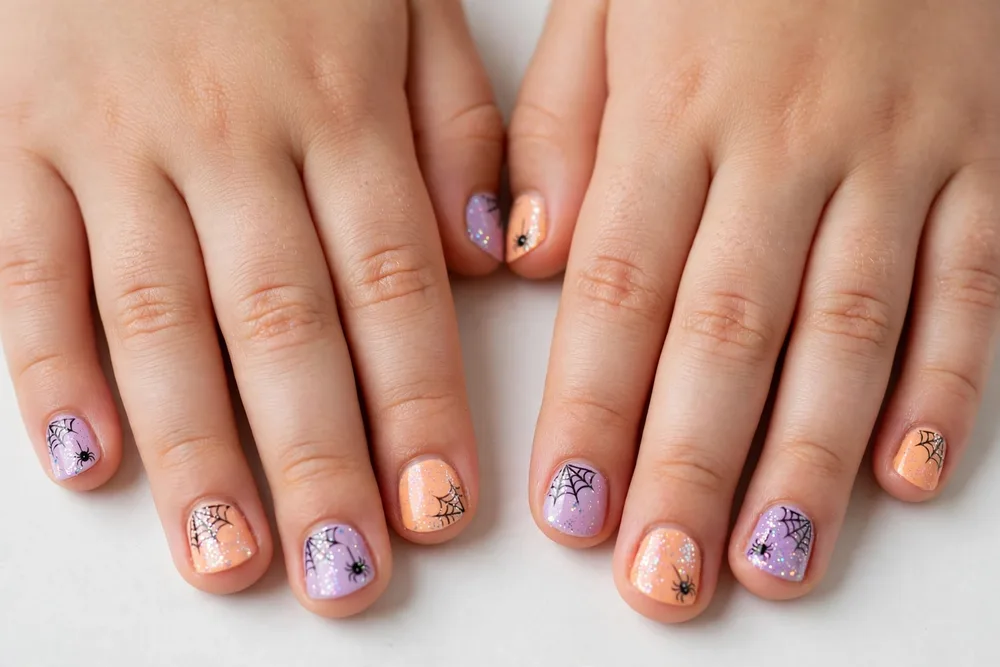
For kids who want a touch of spooky without going full haunted house, a glittery spiderweb on one accent nail is the sweet spot. The rest of the nails stay a simple dark purple or black, and the web — drawn in silver or gold glitter polish with a fine brush — catches the light every time they move their hands.
Keep the web to one or two accent nails so it stays special, and don’t stress about perfect symmetry: draw three or four lines fanning out from one corner, then connect them with little curved arcs. A glitter polish does the hard work for you, and the sparkle hides any wobbly lines beautifully.
Candy Corn Stripes Halloween Nails for Kids
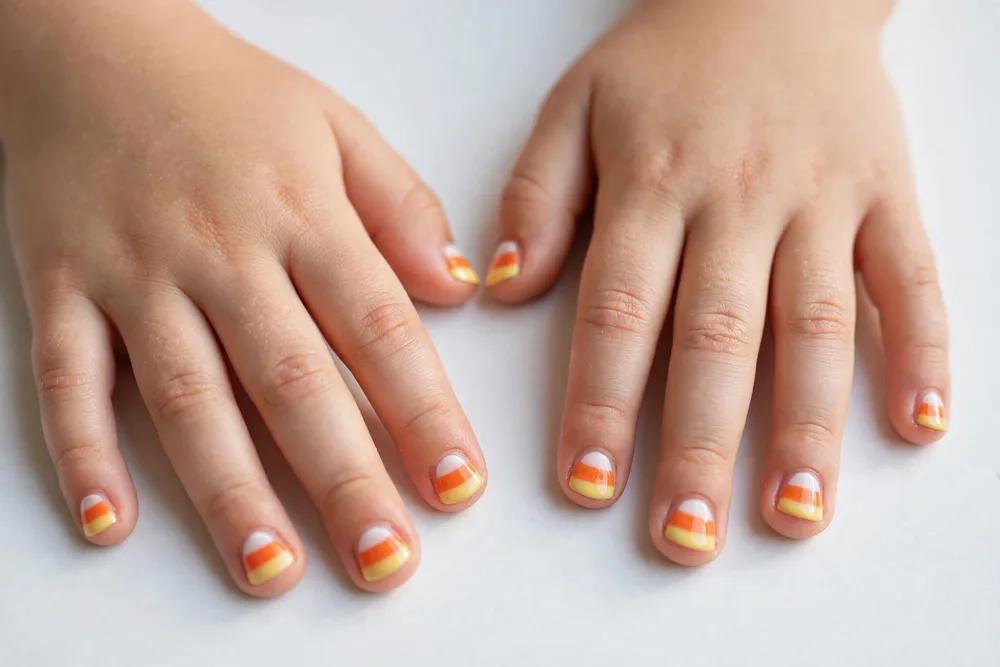
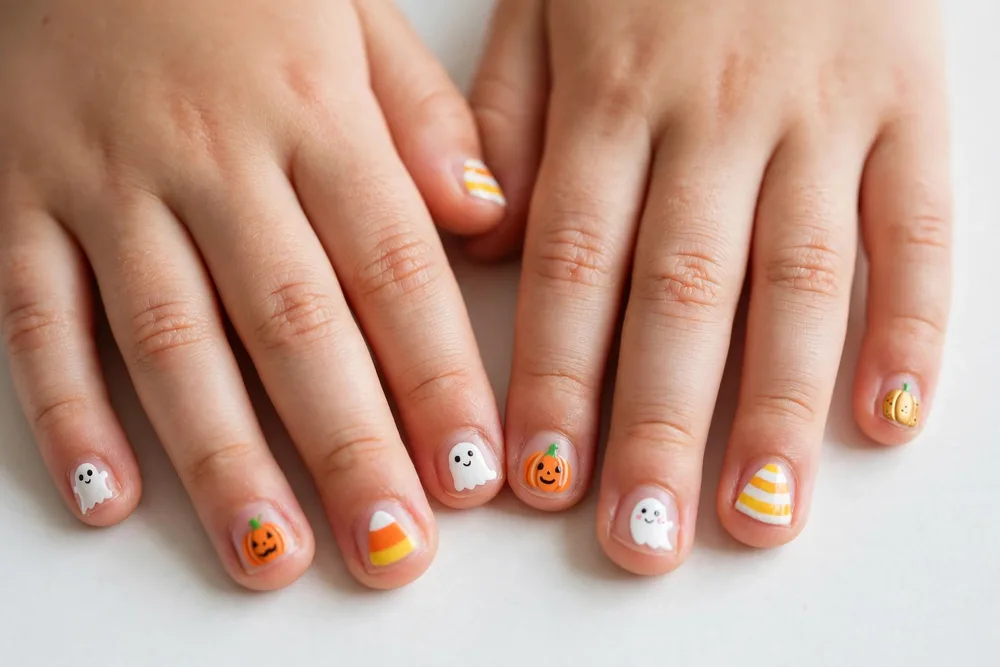
Candy corn is instantly recognizable, and on nails it’s just three stripes: white, orange, and yellow. Painted horizontally across each nail or as scattered candy-corn dots on a neutral base, it’s cheerful, sweet, and about as Halloween as it gets without a single ghost in sight.
Striping tape gives the crispest lines if you have it, but freehand dots are more forgiving — and honestly more kid-friendly. Try OPI Alpine Snow for the white, a bright orange like Essie Tart Deco, and a sunny yellow, and let each stripe dry for a minute before adding the next so the colors don’t bleed together.
Black Cat Silhouette Halloween Nails for Kids
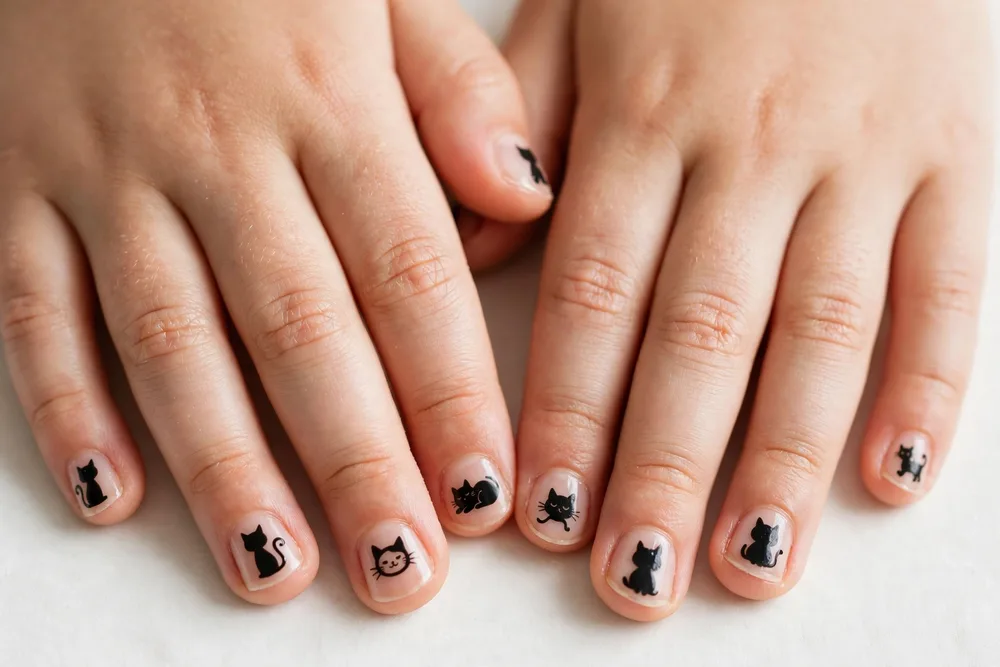
Black cats get a bad rap at Halloween, but on kids’ nails they’re just cute: a simple black silhouette with pointy ears and tiny green or yellow eyes on a pale pink or cream base. The trick is starting small — a little black circle for the head, two tiny triangles for ears — and letting the silhouette do the talking.
A fine nail art pen makes this much easier than a brush, especially on small nails. Add a thin tail curling up one side of an accent nail if you’re feeling brave, or skip it entirely; the face alone reads as “cat” from across the room, and that’s all it needs to.
Pastel Bat Halloween Nails for Kids
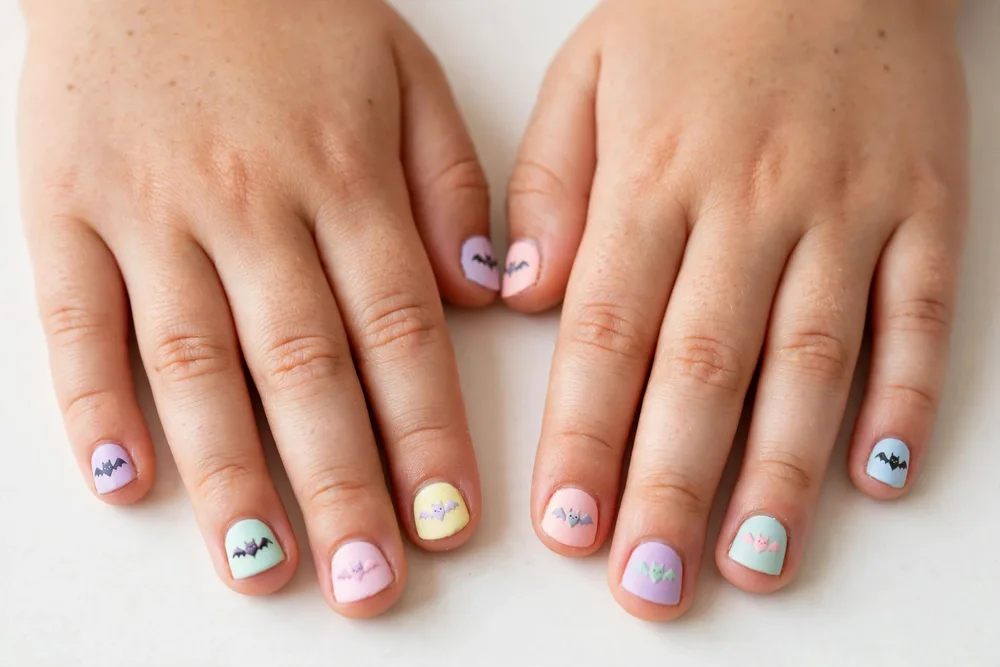
Who says bats have to be scary? On pastel pink, blue, and purple bases, little black bat silhouettes look whimsical rather than spooky — like paper cutouts flying across a sunset sky. This is a lovely pick for kids who love Halloween but prefer cute over creepy.
Draw the bat with a toothpick or a very fine brush: two curved wings joined in the middle, with two tiny ears on top. Bat stickers are an even easier shortcut and come in sheets kids can place themselves, which makes the whole manicure feel like a craft project rather than a chore.
Ghostly French Tip Halloween Nails for Kids
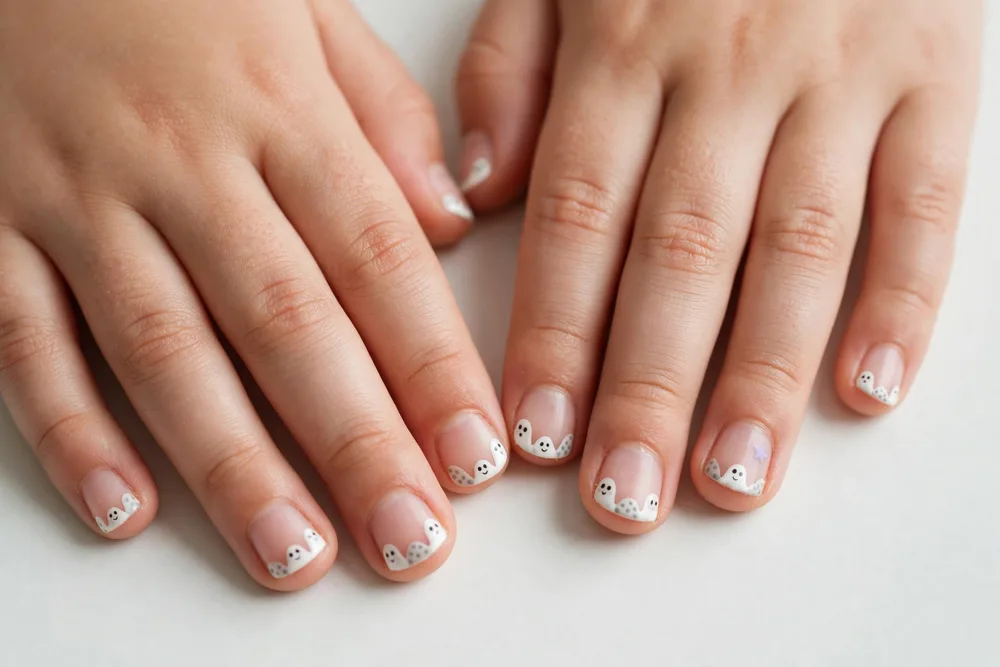
This one takes the classic French manicure and gives it a ghostly twist: instead of a plain white tip, the tip is shaped like the top of a ghost, with two tiny black dot eyes peeking out. It’s subtle enough for school and festive enough for a party, which is a rare combination.
Use a soft, translucent white or pale grey for the tip so it looks ethereal rather than stark, and keep the ghost faces minimal — two dots is genuinely all you need. On short nails, even a single ghost-tip accent nail alongside plain pastel nails looks finished and intentional.
Spooky Eyeball Halloween Nails for Kids
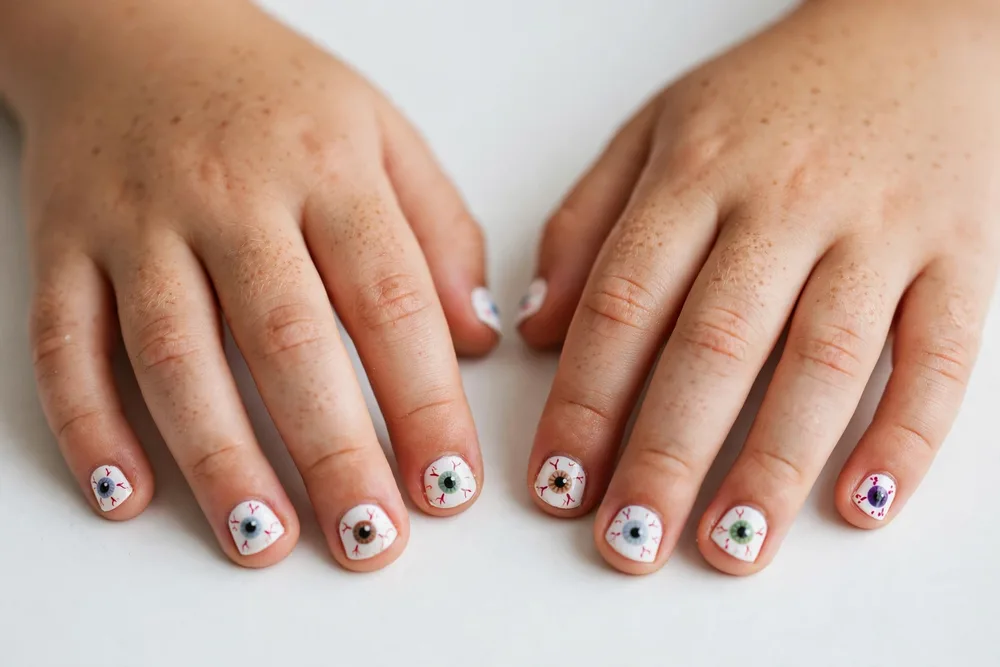
Googly eyeballs are funny, not frightening, and that’s exactly why kids love them on nails. A white dot with a smaller black pupil in the center, repeated at different sizes on a bright orange or lime green base, looks like a whole cast of cartoon eyes watching you — in the best way.
Use two sizes of dotting tools for varied eye sizes, which makes the design look dynamic rather than uniform. This is also one of the fastest designs here: dots dry quickly, there’s no drying-time drama, and if one eye goes wonky, it just looks like it’s winking.
Little Frankenstein Halloween Nails for Kids
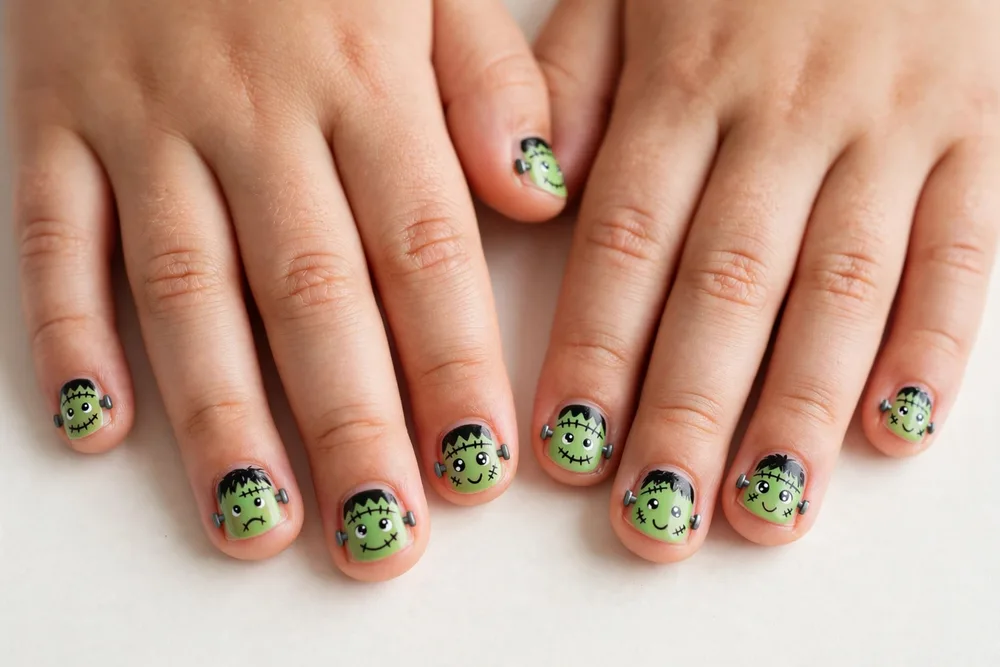
Frankenstein’s monster, the cartoon version, is basically a green rectangle with a flat top and a friendly face — and on nails, that’s a delight. A bright green base, a black line across the top for hair, a few little stitch marks, and two tiny bolts (just grey dots) on the sides, and you’ve got the whole character.
Keep the face simple: dot eyes, a small smile, and stitches made with short black dashes. This design suits short nails really well because the face doesn’t need much room, and green polish like Essie Mojito Madness makes it pop without any extra decoration.
Candy Corn Ombre Halloween Nails for Kids
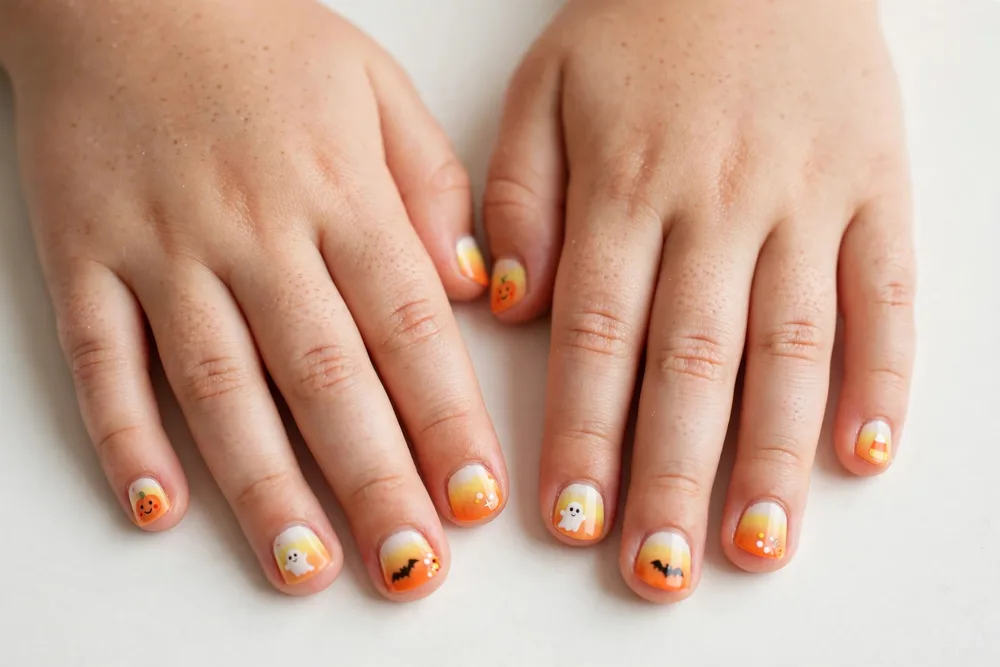
If your child has outgrown simple stripes but isn’t ready for hand-painted characters, candy corn ombre is the perfect middle step. White fades into orange and then yellow across each nail, like a sunset in candy form, and it looks far more advanced than it actually is.
The trick is a small makeup sponge: paint the three colors in stripes onto the sponge, then dab it onto the nail in thin layers, building up gradually. Two or three light dabs beat one heavy one, and a glossy top coat smooths the whole gradient into something that looks salon-done.
Witch Hat and Starry Sky Halloween Nails for Kids
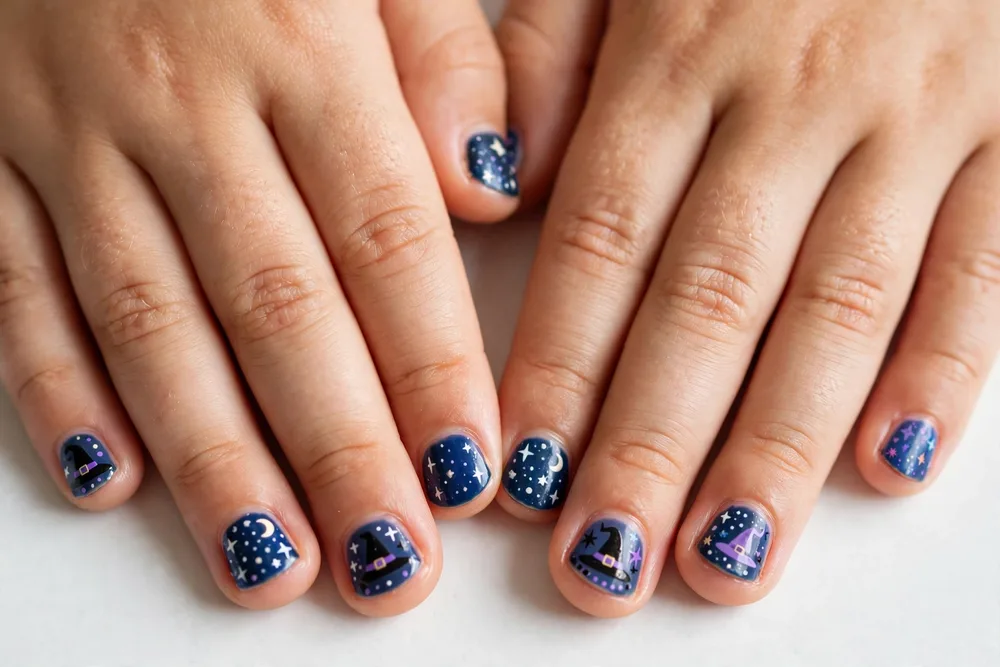
A deep blue or purple base becomes a night sky, and tiny black witch hats sit on it like silhouettes, surrounded by white and silver glitter dots for stars. It’s magical rather than scary, and it pairs beautifully with a witch costume without needing any extra accessories.
Paint the hats as simple triangles with a small brim, then add a tiny sparkly buckle with a dab of silver glitter polish — kids love that detail. The stars can be dots, crosses, or even star-shaped stickers, and the whole sky looks better when the stars are scattered unevenly, like a real night sky.
Mummy Wrap Halloween Nails for Kids
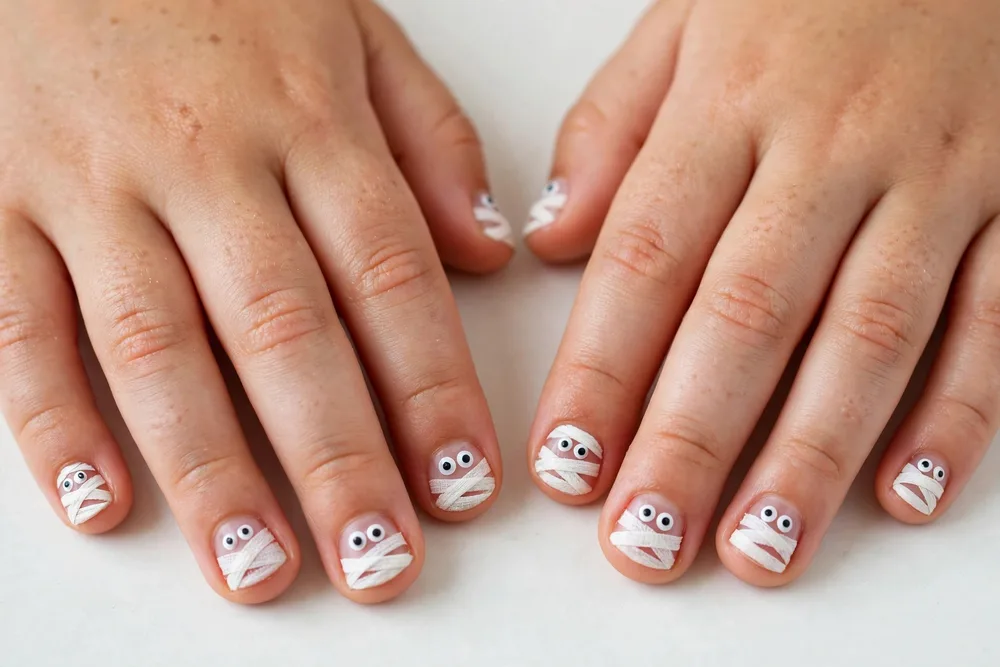
Mummy nails are wonderfully forgiving: white bandage lines crisscrossed over a light base, with two tiny black dots peeking through as eyes. The lines don’t need to be straight — in fact, a slightly messy wrap looks more like a real mummy, which means there’s no wrong way to do this one.
Use a thin striping brush or a toothpick for the bandages, and leave small gaps so the base color shows through like skin. One mummy accent nail per hand is plenty; pair it with plain white or beige nails and the whole set reads as a costume in miniature.
Friendly Spider and Web Halloween Nails for Kids
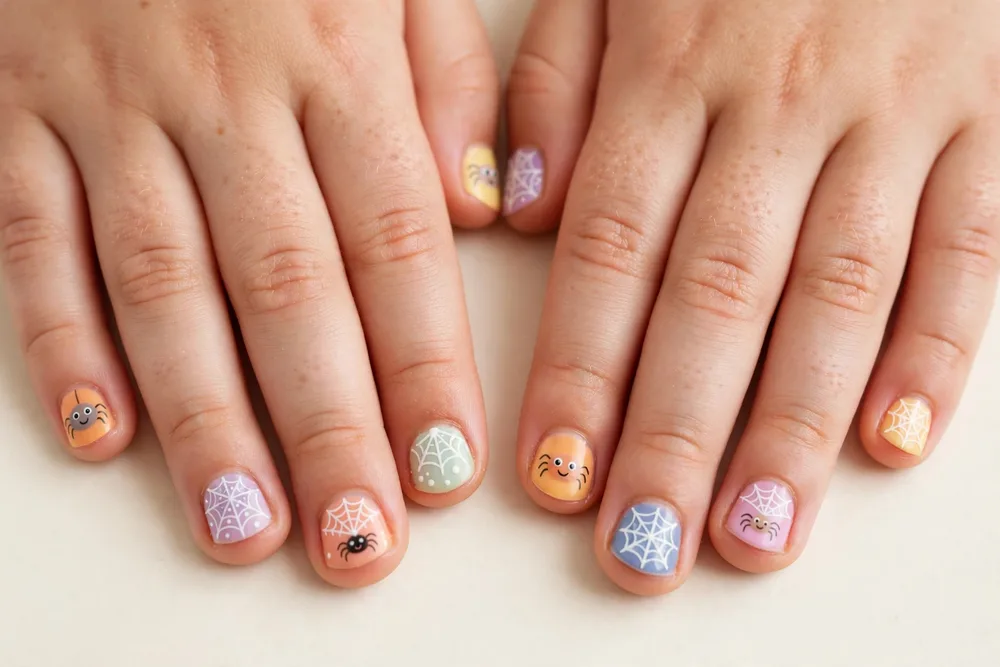
Forget creepy crawlies: this spider has a smiling face, round eyes, and a web that’s more doily than dungeon. A single simple spider on an accent nail, with a minimalist web on the nail next to it, gives the Halloween nod without making anyone squeamish.
Give the spider a tiny smile or cute eyes with a dotting tool — that’s the difference between “aww” and “eek.” Keep the body small and round, add eight short legs with a fine brush (or four per side, counted out loud together, which kids find hilarious), and you’re done.
Pastel Skull Halloween Nails for Kids
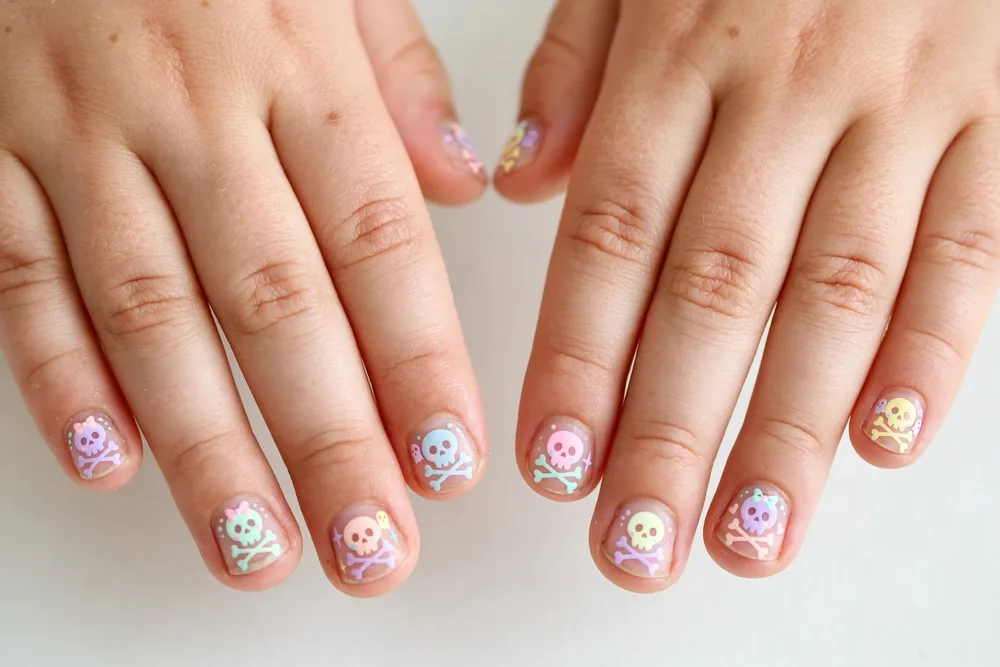
Skulls sound scary until you paint them pastel: mint, lavender, and baby pink backgrounds with simplified white or black skull outlines turn a classic spooky motif into something sweet and a little bit rebellious. It’s the edgy-cute pick for older kids who want Halloween nails that aren’t babyish.
Keep the skull shape simple — a rounded head, two dot eyes, a tiny nose — and soften it further with heart-shaped eyes or a small bow, which instantly makes it kawaii. Skull stickers are a great shortcut here, since a symmetrical skull is hard to freehand on a tiny nail.
“Boo!” Lettering Halloween Nails for Kids
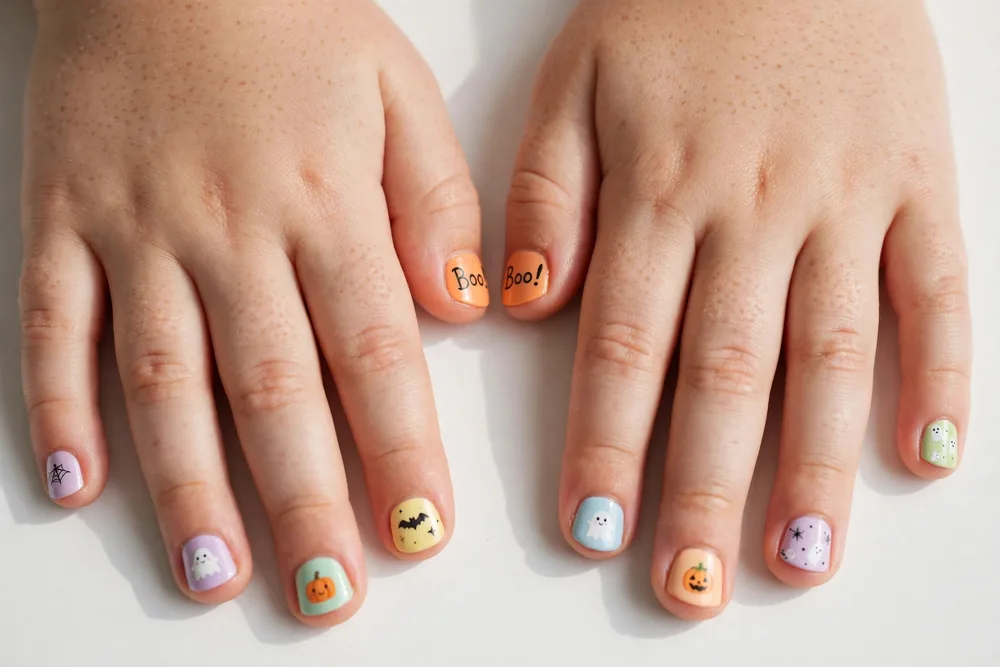
Sometimes a simple message says it all. “Boo!” painted across one or two accent nails in a playful font, on a contrasting orange or black background, is straightforward, funny, and one of the easiest designs in this whole list — no characters, no shading, just letters.
Use a fine-tipped nail art pen rather than a brush for crisp lettering, and practice on paper first — that’s a fun step kids actually enjoy. If lettering feels shaky, letter stickers or a “Boo!” decal give the same effect, and the rest of the nails can stay plain so the message stands out.
Autumn Leaf and Acorn Halloween Nails for Kids
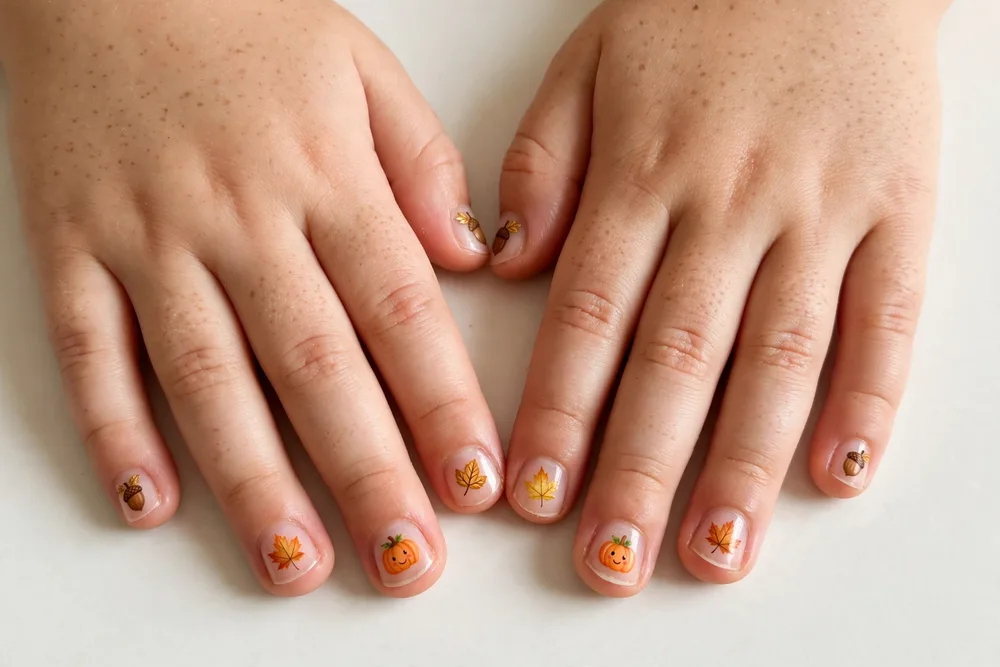
Not every October manicure has to scream Halloween. Little leaves and acorns in warm reds, oranges, golds, and browns on a nude base are a gentler, seasonal option — perfect for kids who want to join in the autumn fun without the ghosts and ghouls, or for a set that still looks right in November.
Vary the leaf colors across nails and add tiny vein details with a fine brush for a charming, hand-painted feel. Acorns are just a brown dot with a darker cap, so even very young painters can manage them, and the whole design doubles as a nature-craft afternoon.
Minimalist Pumpkin Halloween Nails for Kids
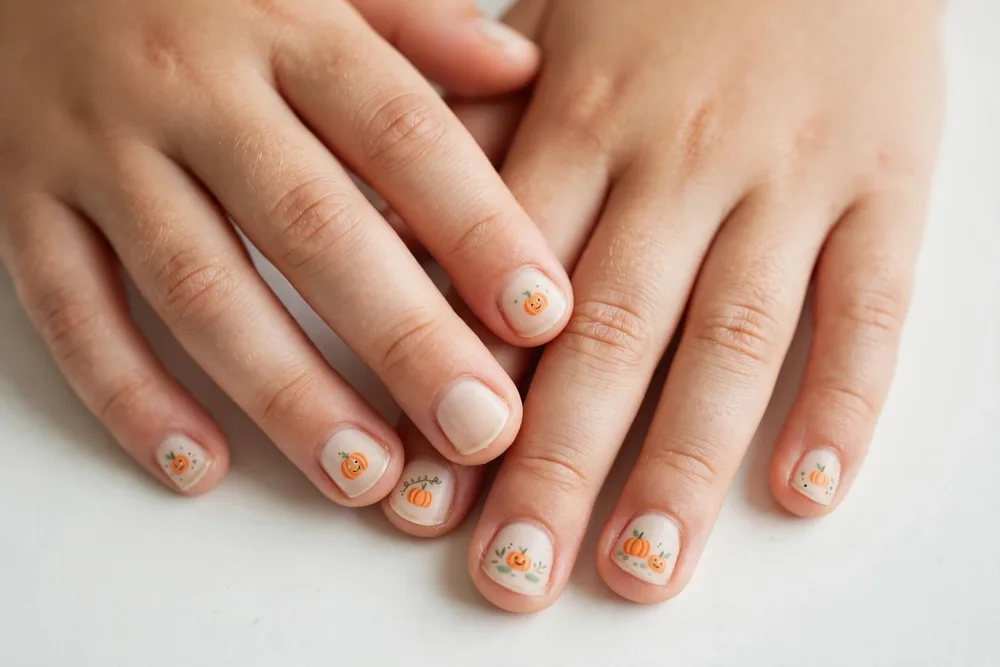
Minimalist pumpkins are the timeless version of the pumpkin nail: a clean, light base, one simple orange pumpkin per nail (or per accent nail), and nothing else. No faces, no vines, no glitter — just the shape, done well, which makes it the easiest pumpkin design here and one that never looks dated.
Add a tiny glitter stem if you want one small flourish, or a subtle holographic top coat for a modern shimmer that catches the light without adding clutter. This is also the best design for kids who fidget, since a single pumpkin per nail dries fast and smudges less.
Mix-and-Match Halloween Icons Halloween Nails for Kids
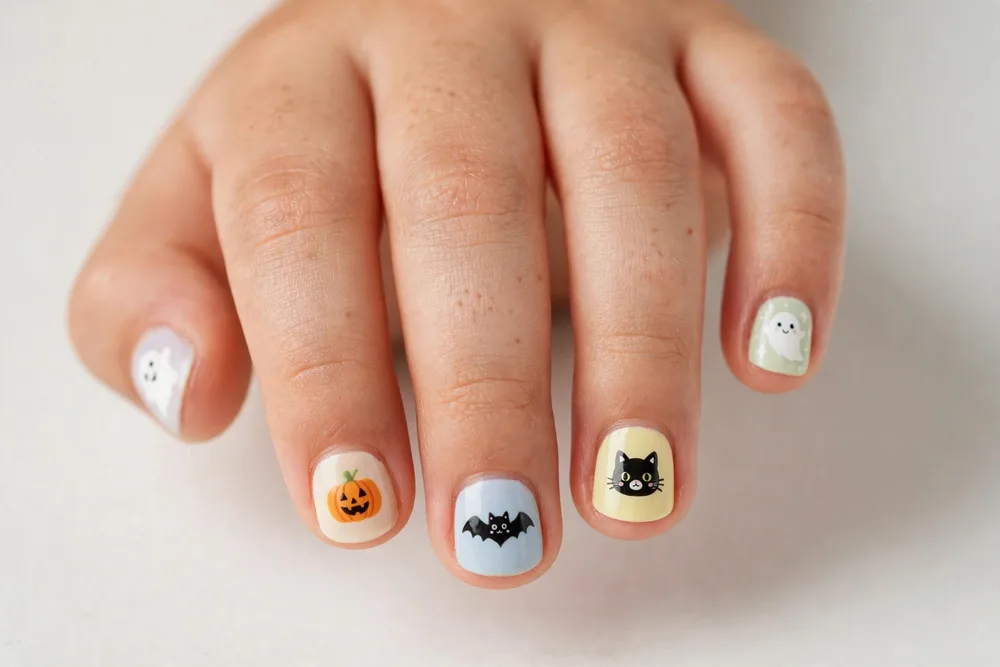
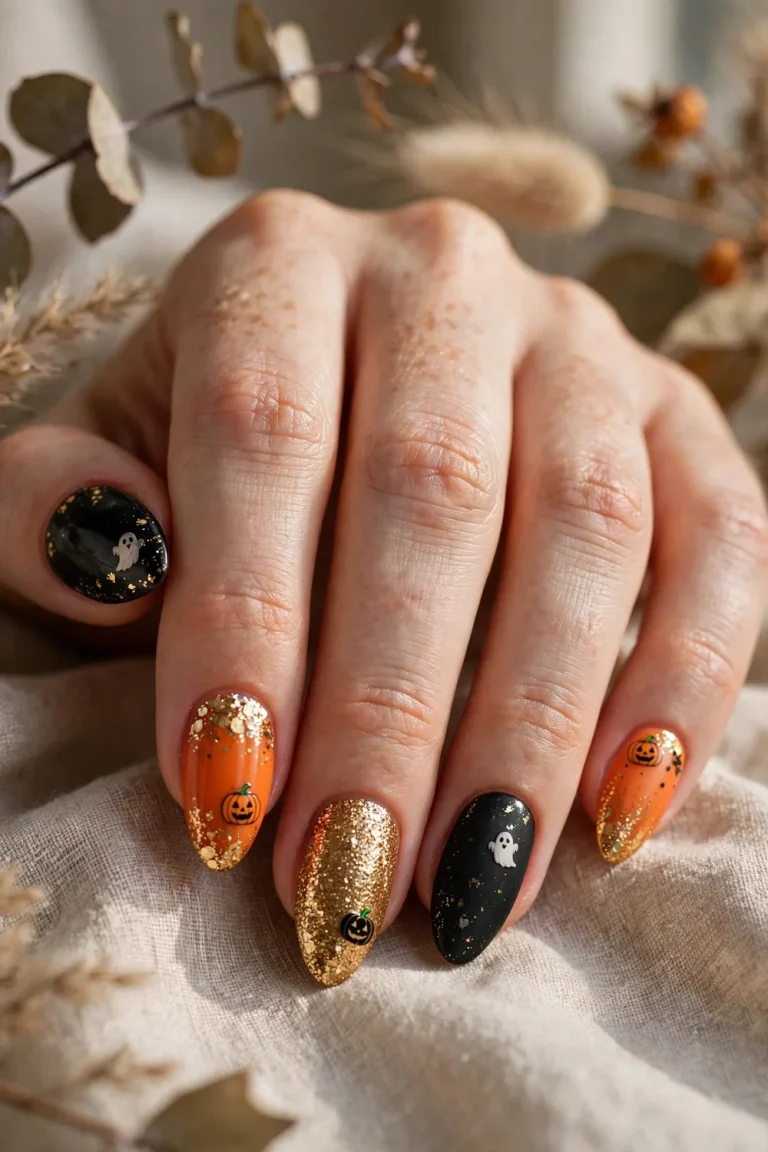
Can’t pick just one design? Don’t. Give each nail a different icon from this list — a ghost, a pumpkin, a bat, a black cat, an eyeball — and let the set become a tiny Halloween parade. Kids love choosing which icon goes where, and the variety means no single nail has to be perfect.
The trick to making a mix-and-match set look planned rather than random is a shared palette: keep all the icons in the same few colors (orange, black, white, purple) on the same base shade. Then every nail, however different, clearly belongs to the same set.
Glow-in-the-Dark Ghost Dots Halloween Nails for Kids
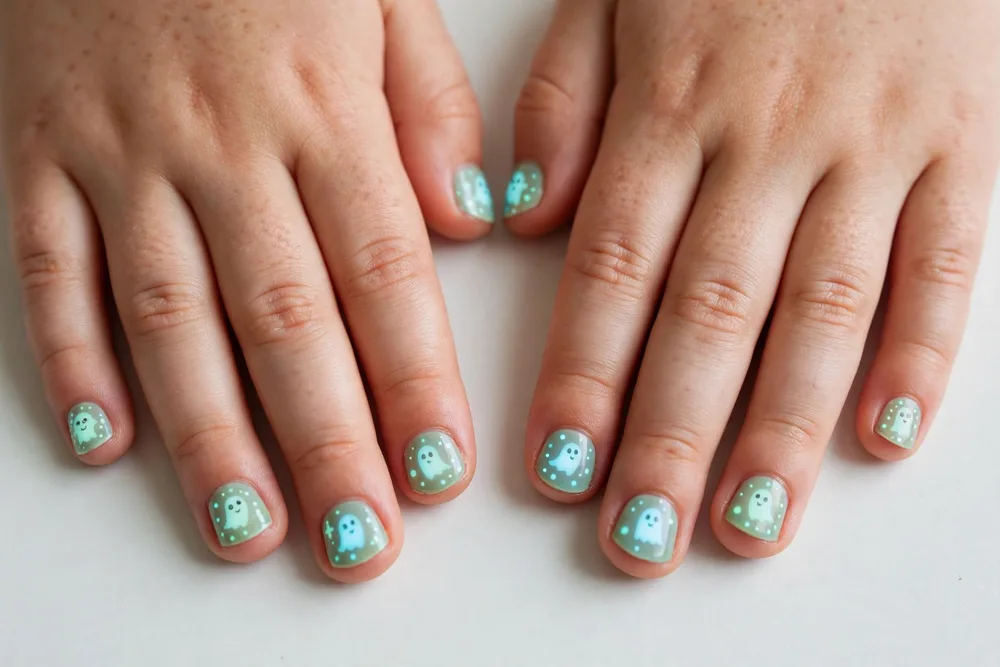
Save the best surprise for last: a glow-in-the-dark top coat over simple ghost dots turns an ordinary daytime manicure into a party trick after dark. By day, the nails look like plain white dots on a dark base; when the lights go out at a Halloween party, little ghosts glow.
Paint the ghost dots first, let them dry completely, then add the glow top coat and “charge” it under a bright light for a few minutes before heading out. It’s the design kids show everyone at the party, and it’s also the easiest on this list to remove — just peel or wipe off as usual.
How to Ask Your Nail Tech for Halloween Nails for Kids
For kids, book a short, simple appointment — not a full nail art session — and tell the salon upfront that it’s for a child, so they plan for a shorter sitting and gentler products. Bring two or three reference photos from this list, say which designs go on which nails, and ask specifically for water-based or peel-off polish, short natural nails (no extensions, no acrylics for kids), and a quick-dry top coat. If your child is nervous, ask whether they can paint one nail first as a trial — most techs are happy to, and it turns the appointment into something to look forward to rather than sit through.
Frequently Asked Questions About Halloween Nails for Kids
Are Halloween nails for kids safe?
Yes, when you use the right products: water-based, peel-off polishes made for kids are the safest choice, and regular polish is fine for older children with adult supervision. Skip acrylics, gels, and nail glue for kids, keep polish off broken skin, and remove it with a gentle non-acetone remover. Pediatric guidance also notes that very young children who still put their fingers in their mouths should skip polish altogether.
What age can kids wear Halloween nail polish?
Most kids enjoy simple polish from around age 3 or 4 with supervision, though peel-off polish is the best starting point since it comes off without remover. Older kids, around 7 and up, can usually handle more detailed designs and sit still long enough for a full set. The real test is patience, not age — if they can sit for ten minutes, they’re ready.
How do you remove kids’ Halloween nails easily?
If you used peel-off polish, just lift an edge at the cuticle and peel slowly — no remover needed. For regular polish, soak a cotton pad in non-acetone remover, hold it on the nail for 20 to 30 seconds, then wipe gently. Follow with hand washing and a dab of moisturizer or cuticle oil, since even gentle removers can dry small hands out.
Can kids wear Halloween nails to school?
Usually yes, especially the subtler designs here like pastel ghosts, minimalist pumpkins, or ghost French tips — but check your school’s dress code first, since some schools limit nail polish or bright colors. Peel-off polish is a handy workaround: it looks great for a party and comes off before Monday morning if needed.
Do Halloween nails for kids last long?
Peel-off polish typically lasts one to three days on active little hands, which is honestly perfect for a party or a weekend. Regular polish lasts closer to three to five days before chips appear, and a good top coat plus avoiding long baths can stretch it a bit further. Either way, plan on a quick touch-up rather than a two-week manicure.
What if my child bites their nails?
Keep the design very simple — dots, stickers, and one accent nail — so there’s less to pick at, and use a peel-off base so bitten or chipped nails come off cleanly rather than peeling the nail itself. Painting nails can actually help some kids stop biting, since they don’t want to ruin the design, but if biting breaks the skin, skip polish until it heals.
Whichever set you picked — the friendly ghost, the kawaii pumpkin, or the glow-in-the-dark surprise — I hope it makes Halloween a little more magical for your little one. Take the photo before trick-or-treating, save it to your fall nail board, and let them show it off proudly. For more seasonal inspiration, head back to Pink Polish and browse the latest roundups.